In this tutorial I will be showing you how to create the perfect studio lighting for your 3D models in blender3D. I am going to assume you know how to use the interface.
Introduction
Now in the past blender was well known for being crap at rendering and most professional users would look upon blender artists in disgust. Not now, with the additional of 'cycles' blender's very own unbiased render engine we can produce studio quality images. Read more to find out how.
Studio setup
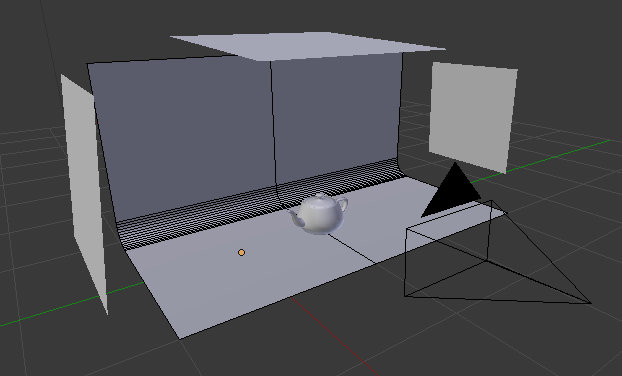
We are going to create the above studio setup.Open blender and add a plane onto the scene. In edit mode select one edge and press 'e' to extrude up so you have an 'L' shaped plane. Press 'a' to select all faces then press 'w' and choose 'bevel.' Whilst dragging your mouse down scroll the mouse to subdivide your bevelled edge. This is going to be the basic studio floor.
Add two planes either side and one above. These are going to be our light sources.
Add your model to the scene. In my example, I have used the utah teapot, you can find the model with google.
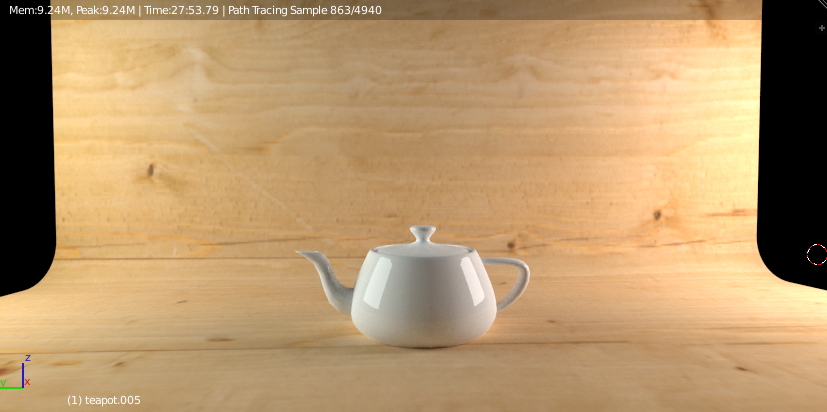
Now let's set up the lighting. Choose 'cycles' render at the top bar. Now click on the render material button and change each light plane to an 'emission' property.
Set your floor and model to a simple diffuse.
If you wish to add a texture you have to do the following:
- Click on the object then click the render material button and choose diffuse
- Next select image and open the image you want
- Now go into edit mode and click mesh > uv unwrap
- Now go into the uv editor viewport and open up your image, edit as necessary
Lastly, go into render settings and change the samples value to be 1000 for preview. Finally, click the view port and choose rendered view. Go grab a cup of coffee and watch your scene render.
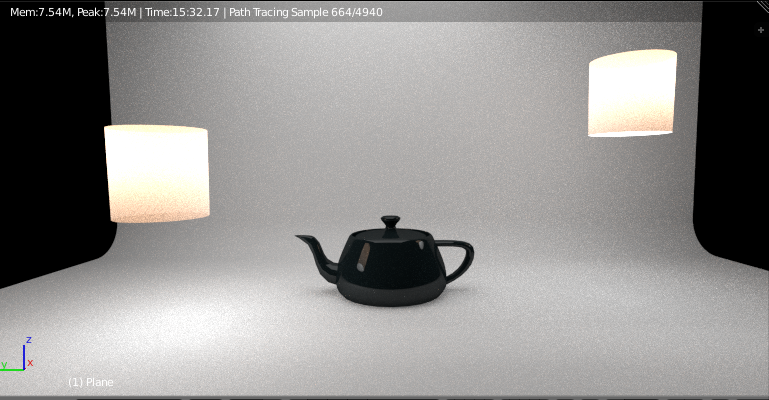
Next I will show you how to create perfect sss lighting. Unfortunately blender's emitters will either display totally white and does not make for a nice graduated lighting effect. See below. 
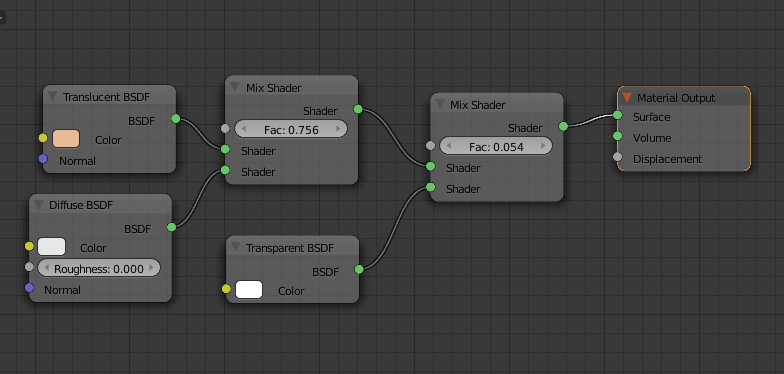
So in order to create those cylinder light boxes simply add a cyclinder to the scene and remove the front and back panels. Edit mode > faces. Now add a point light to the center of the cylinder. Finally, let's create the magic of sss in our material node editor. The settings are shown below.

As you can see blender is certainly no mediocre render option, it very easily compares to 3Dsmax's vray engine. So enjoy having a play with the blender files, which I have attached in this tutorial. And remember your lighting and materials makes all the difference to your final image.