Animation Strategy
Welcome to part three of the tutorial; part two can be found here.
For this animation, I have chosen to redraw the YinYang Drawable at each frame. This means recreating the YinYang object with different constructor parameters on every frame (the current YinYang implementation has a zero-arg constructor).
Animating The First Yin Arc
Do you recall that our Yin teardrop contains three arcs in total? The first step to animate our Yin Yang is to isolate the parts that need to be animated. You can go ahead and comment out the code that draws the second and third Yin arcs, as well as the code that draws the Dots.
Your drawYin() method should look like the code below.
private fun drawYin(canvas: Canvas){
   val yinPath = Path().apply {
       addArc(
           bounds.right * 0.25f, // 0.25 = full arc visible. 0.5 = arc invisible
           bounds.exactCenterY(),
           bounds.right * 0.75f, // 0.75 = full arc visible. 0.5 = arc invisible
           bounds.bottom.toFloat(),
           270f,
           -180f
       )

/*            arcTo(
           0f,
           0f,
           bounds.right.toFloat(),
           bounds.bottom.toFloat(),
           90f,
           -180f,
           false
       )

       arcTo(
           bounds.right * 0.25f,
           0f,
           bounds.right * 0.75f,
           bounds.exactCenterY(),
           270f,
           180f,
           false
       )*/
   }

   canvas.drawPath(yinPath, yinPaint)
}
Your app now should look like the screenshot below, with the first Yin arc the only thing being drawn.

To animate the first arc to invert on itself, we need to perform three main tasks:
- As the animation progresses, compress the arc over time until its width reaches zero. You can compress the arc by moving its top left and top right coordinates together.
- When its width is at zero, invert the sweep angle as well.
- Animates its width back to the original width.
Let us try some simple hard-coded samples first before using it in an animation. Comment out the code for your first arc and try the one below.
val isInverted = false // Keeps track of whether the drawable is inverted
val animatedFraction = 0.25f // animation progress
val animatedValue = 0.10f

addArc(
   bounds.right * (0.25f + animatedValue), // 0.25 = full arc visible. 0.5 = arc invisible
   bounds.exactCenterY(),
   bounds.right * (0.75f - animatedValue), // 0.75 = full arc visible. 0.5 = arc invisible
   bounds.bottom.toFloat(),
   270f,
   if (animatedFraction < 0.5f)
       if (isInverted) 180f
       else -180f
   else
       if (isInverted) -180f
       else 180f
)
The code above produces the following image.

I highly recommend you to play around with isInverted, animatedFraction, and animatedValue to get a feel of the code.
Below are some sample runs.
val isInverted = true // Keeps track of whether the drawable is inverted
val animatedFraction = 0.25f // animation progress
val animatedValue = 0.10f
val isInverted = false // Keeps track of whether the drawable is inverted
val animatedFraction = 0.85f // animation progress
val animatedValue = 0.20f
Once you are comfortable with the code, move the three variables into the class constructor.
class YinYang(
   private val animatedValue: Float,
   private val isInverted: Boolean,
   private val animatedFraction: Float = 0f
): Drawable() {
Also, remove the commented out code for the first arc to keep your code clean. We do not need it anymore.
In onCreate(), use the code below to create an animator.
val yinYang = findViewById<ImageView>(R.id.yin_yang).apply {
   setImageDrawable(YinYang(0f, isInverted))
}

yinYang.setOnClickListener {
   ValueAnimator.ofFloat(0f, 0.25f, 0f).apply {
       duration = 2_000L
       addUpdateListener { animator ->
           yinYang.setImageDrawable(
               YinYang(
                   animator.animatedValue as Float,
                   isInverted,
                   animatedFraction
               )
           )
       }
       doOnEnd {
           isInverted = !isInverted
       }
       start()
   }
}
In your MainActivity, add the isInverted property.
private var isInverted = falseOur arc animation depends on the fractions from 0 -> 0.25 for the compress animation, and then from 0 -> 0.25 for the inflate animation. So we will give it that value as the animation fraction goes from 0 -> 1. In summary, this means;
- At animation fraction zero, we pass zero as the animated value as well.
- At animation fraction 0.25, we pass in 0.125 as the animated value. This is when arc compression is happening.
- At animation fraction 0.5, we pass in 0.25 as the animated value. Arc finishes compressing at this point.
- At animation fraction 0.75, we pass in 0.125 as the animated value. This is when arc inflation is happening.
- At animation fraction 1, we pass in 0.25 as the animated value. Arc finishes inflating.
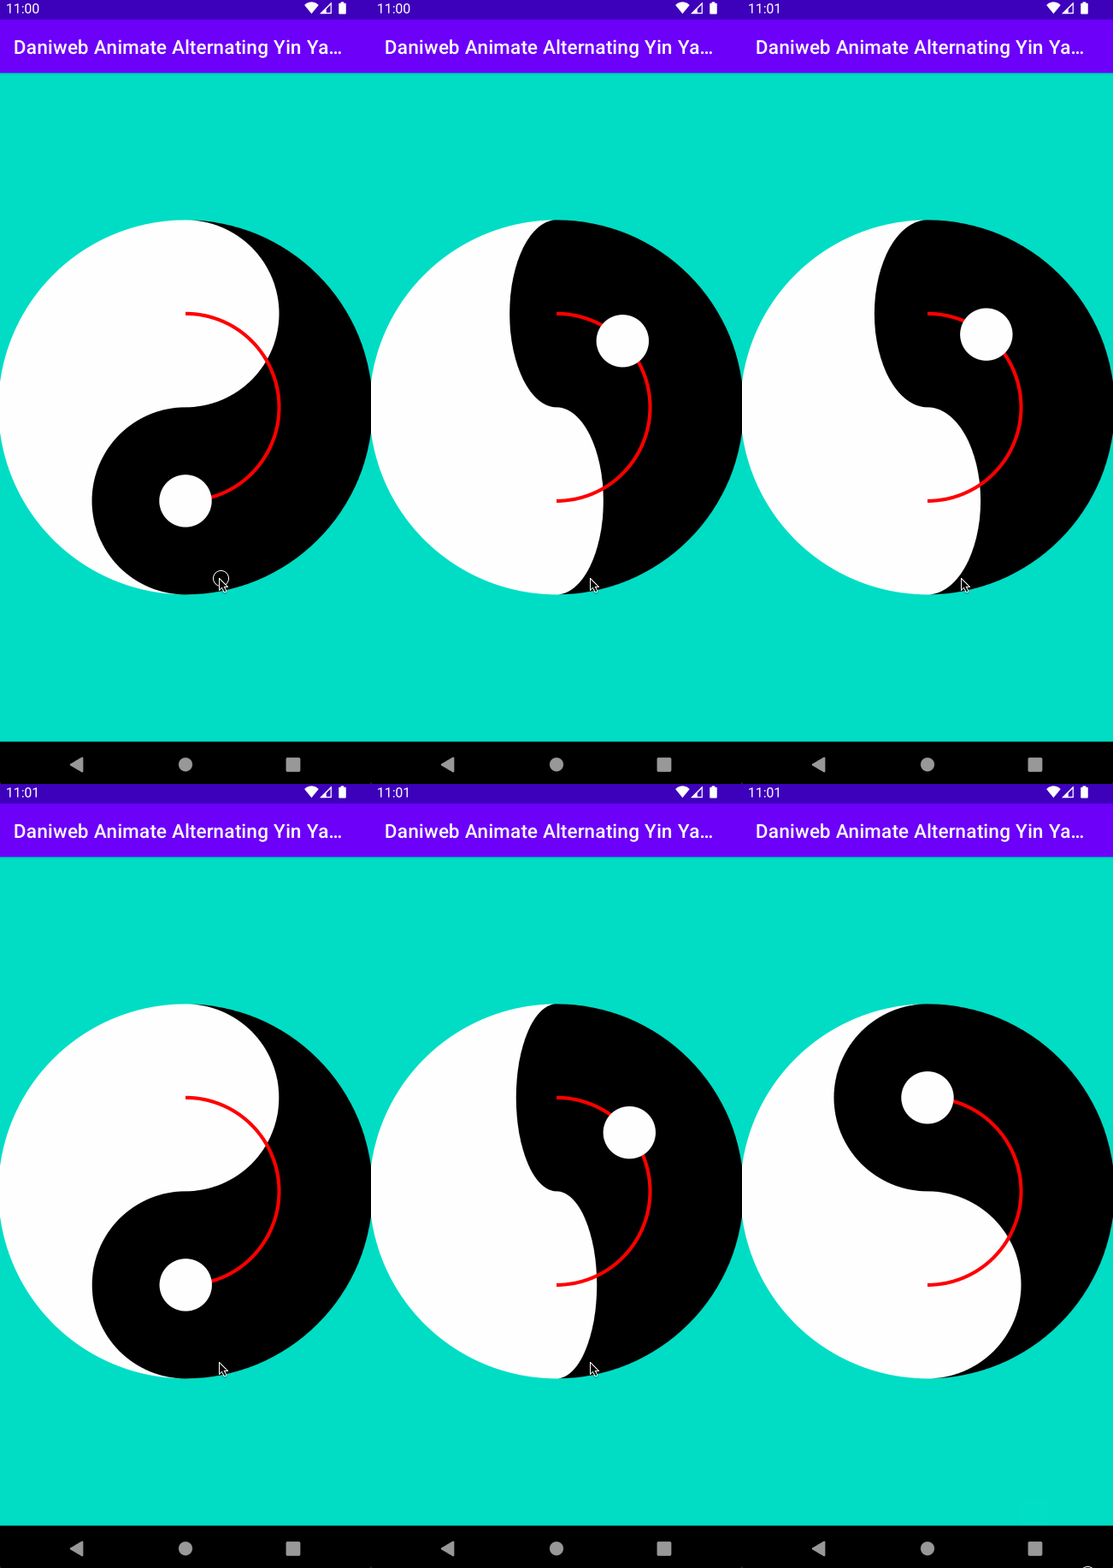
When we run the code, the app should behave similarly to the animation below.

Animate the Yin
The second arc can be kept as-is (it does not move anyway), so you can remove it from the commented out section. After the second arc is enabled, your animation should behave similarly to the code below.

The third arc needs to be changed, so you can remove the old commented out version and add the new version below. It is very similar to the first arc, only the sweep angles are different.
arcTo(
   bounds.right * (0.25f + animatedValue),
   0f,
   bounds.right * (0.75f - animatedValue),
   bounds.exactCenterY(),
   270f,
   if (animatedFraction < 0.5f)
       if (isInverted) -180f
       else 180f
   else
       if (isInverted) 180f
       else -180f,
   false
)
After adding the third arc, we complete the Yin

Animate The Yang Dot
The current version of the Yang Dot is no longer good for our animation, so you can remove it from your code.
To animate the Yang Dot circularly moving up and down with the Yin Yang animation, we need to do three main things:
- Draw an arc with the starting position as the current position of the specific Dot. The arc must end with the ending position of the Dot for the current animation. The arc acts as a guide/ruler for the Dot.
- Find the position on the arc at a specific animation fraction.
- Use that position to draw the Yang Dot.
In the drawYangDot() function, add the code below into it to draw an arc. Note that this arc is only visible now for easy visualization. It should not be drawn on the screen at the final step.
val yangDotPath = Path().apply {
    addArc(
        bounds.right * 0.25f,
        bounds.bottom * 0.25f,
        bounds.right * 0.75f,
        bounds.bottom * 0.75f,
        if (isInverted) 270f
        else 90f,
        if (isInverted) 180f
        else -180f
    )
}

//Use for debugging
canvas.drawPath(
    yangDotPath,
    Paint().apply {
        color = Color.RED
        style = Paint.Style.STROKE
        strokeWidth = 10f
    }
)
When we run the app, we can see it in red below.

Also, inside drawYangDot(), append the code below to draw the Yang Dot.
// Finds current position on arc at animation frame
val yangDotPosition = FloatArray(2)
PathMeasure(yangDotPath, false).apply {
   getPosTan(length * animatedFraction, yangDotPosition, null)
}

canvas.drawCircle(
   yangDotPosition[0],
   yangDotPosition[1],
   bounds.right * 0.07f,
   yangPaint
)
To find the position of a Path, you can use PathMeasure like above.
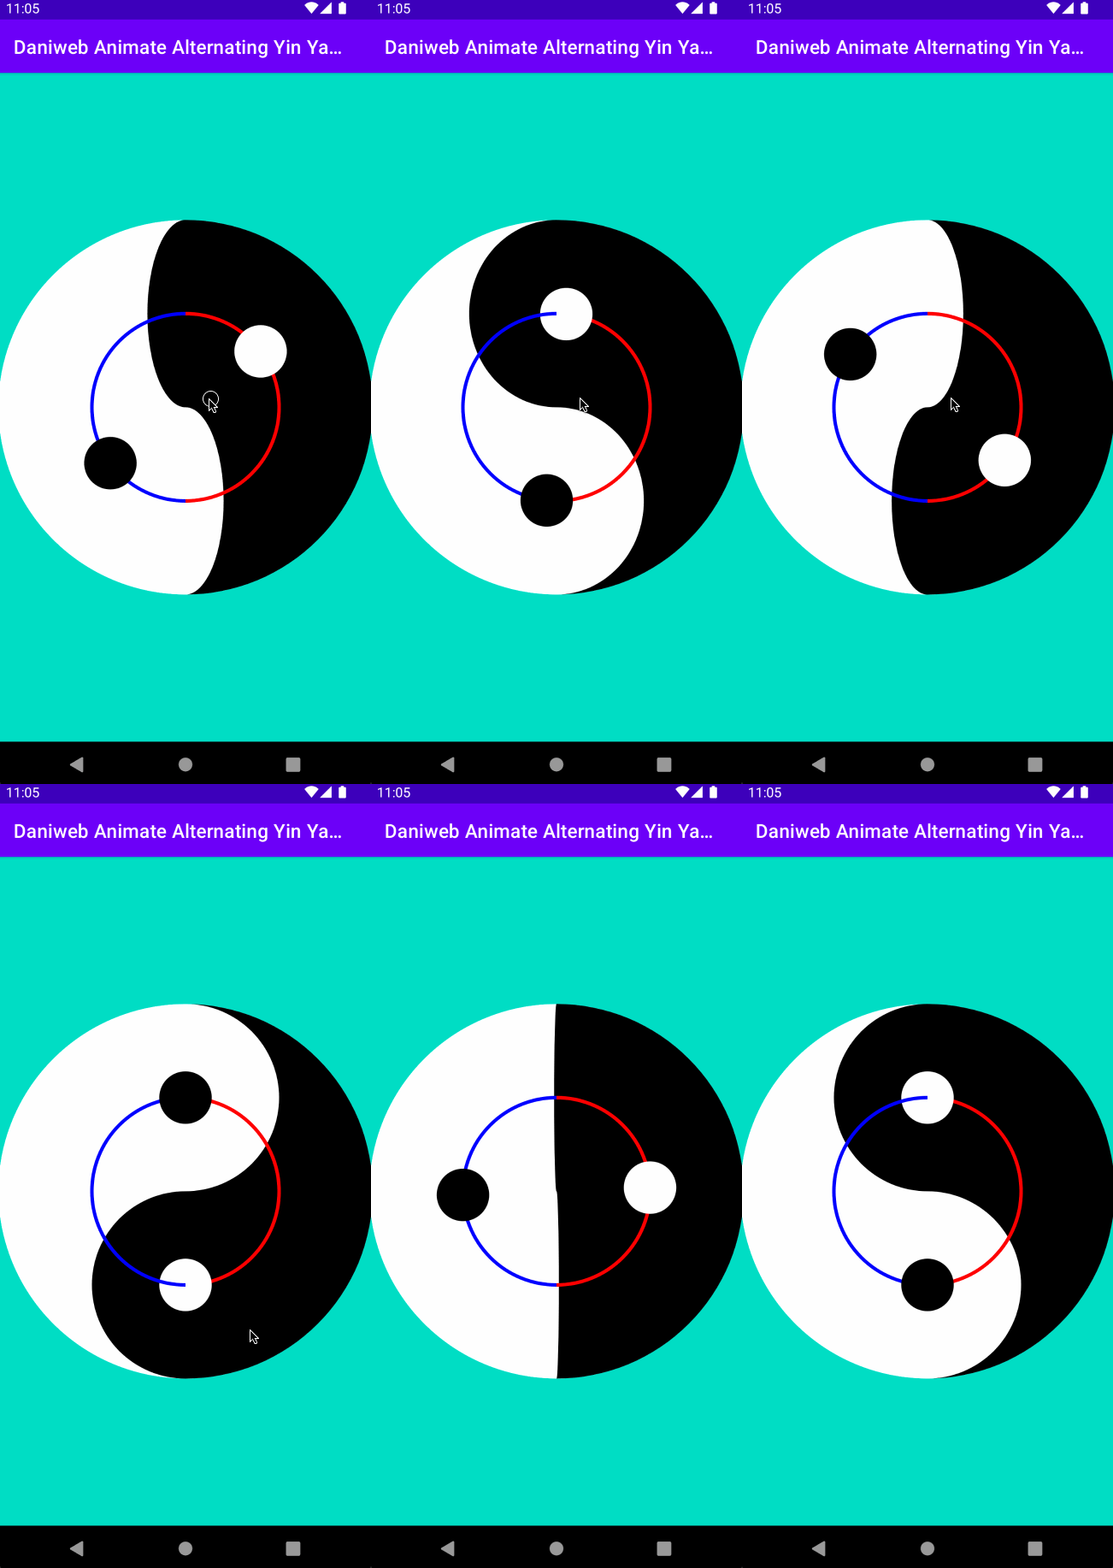
You can now review the animation and then remove the call to draw the arc afterwards.

Animate The Yin Dot
For the Yin Dot, follow the same strategy used for the Yang Dot.
private fun drawYinDot(canvas: Canvas){
   val yinDotPath = Path().apply {
       addArc(
           bounds.right * 0.25f,
           bounds.bottom * 0.25f,
           bounds.right * 0.75f,
           bounds.bottom * 0.75f,
           if (isInverted) 90f
           else 270f,
           if (isInverted) 180f
           else -180f
       )
   }

   //Use for debugging
   canvas.drawPath(
       yinDotPath,
       Paint().apply {
           color = Color.BLUE
           style = Paint.Style.STROKE
           strokeWidth = 10f
       }
   )

   val yinDotPosition = FloatArray(2)

   PathMeasure(yinDotPath, false).apply {
       getPosTan(length * animatedFraction, yinDotPosition, null)
   }

   canvas.drawCircle(
       yinDotPosition[0],
       yinDotPosition[1],
       bounds.right * 0.07f,
       yinPaint
   )
}
Remove the debug call to see the almost final result.

Animate Alternating Color
To animate from one color to another based on animation fraction, we can use the method blendARGB() from the class ColorUtils. Replace your yinPaint and yangPaint with the new versions below if you want your halves to alternate in color as well.
private val yinPaint = Paint().apply {
   color =  if (isInverted) {
       ColorUtils.blendARGB(
           Color.WHITE,
           Color.BLACK,
           animatedFraction
       )
   } else {
       ColorUtils.blendARGB(
           Color.BLACK,
           Color.WHITE,
           animatedFraction
       )
   }
}

private val yangPaint = Paint().apply {
   color =  if (isInverted) {
       ColorUtils.blendARGB(
           Color.BLACK,
           Color.WHITE,
           animatedFraction
       )
   } else {
       ColorUtils.blendARGB(
           Color.WHITE,
           Color.BLACK,
           animatedFraction
       )
   }
}
Summary
Congratulations, we have learned how to animate an alternating Yin Yang symbol in this series of tutorials. The full project code can be found at https://github.com/dmitrilc/DaniwebAnimateAlternatingYinYangSymbol.