Introduction
In the previous tutorial, we learned how to set up our own RabbitMQ server. In this tutorial, we will learn how to create our own exchange and queue.
Goals
At the end of the tutorial, you would have learned:
- How to create your own exchanges and queues.
Tools Required
- A RabbitMQ server.
Prerequisite Knowledge
- Basic Docker.
Project Setup
To follow along with the tutorial, perform the steps below:
- Log into RabbitMQ’s management interface.
Direct Exchange Routing
Although an AMQP server is capable of many different methods of routing messages, we will only learn about direct exchanges in this tutorial. The diagram below illustrates the direct exchange model.
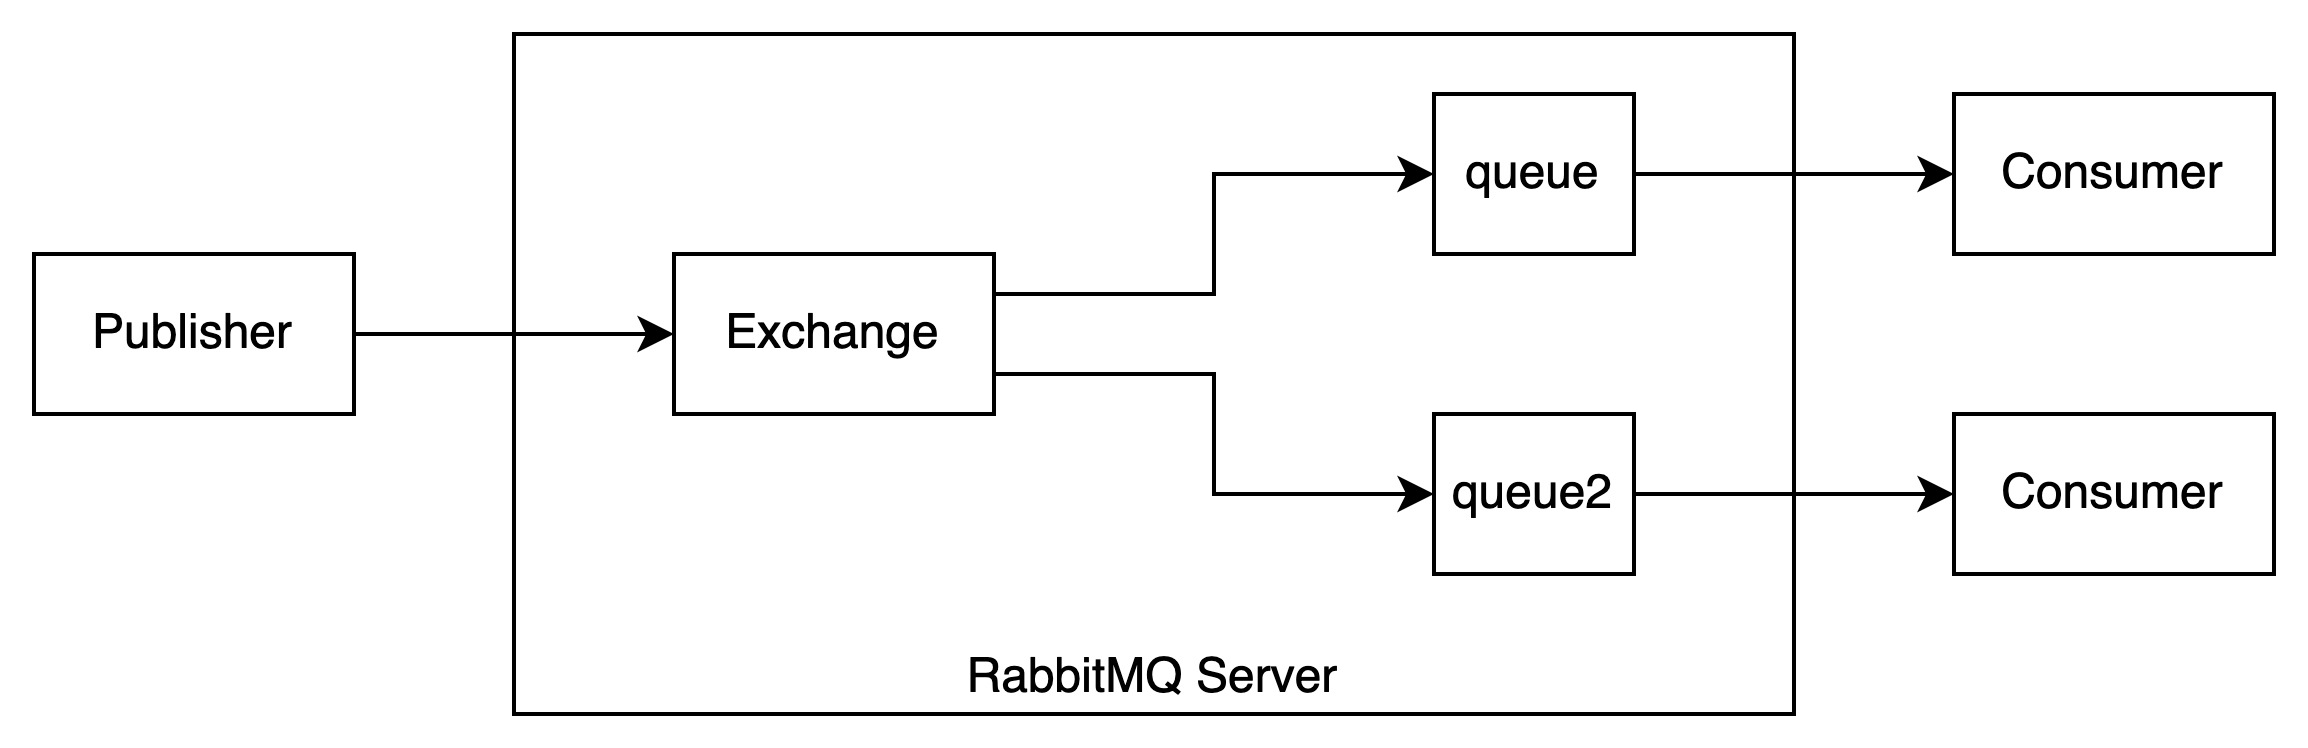
If you are new to AMQP, the diagram above might look confusing, so here is my best attempt to break it down to you.
- Outside the RabbitMQ Server, there is the Publisher. The publisher sends messages to exchanges. It is up to the exchanges to decide which queue to route the messages to.
- The Exchange routes the messages to queues that you have configured it to. We will discuss how this configuration works later in the tutorial.
- Queues are objects that store messages and send them out to consumers. RabbitMQ queues are FIFO (first in, first out). After the messages are sent to the queues, the messages stay there until they are consumed. By default, the messages are automatically removed after the client consumes them AND sends back an ack. This also means that messages will stay in the queue even after they were consumed, but no ack has been received from the clients.
- The consumers are other client programs that consume the messages from the queues. Consumers are also sometimes called clients. There are many client applications available, such as the RabbitMQ Java Client, RabbitMQ .NET client, Bunny (Ruby), Pika (Python), or amqp-client (NodeJS).
Setting Up An Exchange
RabbitMQ already came with some default exchanges readily for use. You can see them by clicking on the Exchanges tab in the management interface.
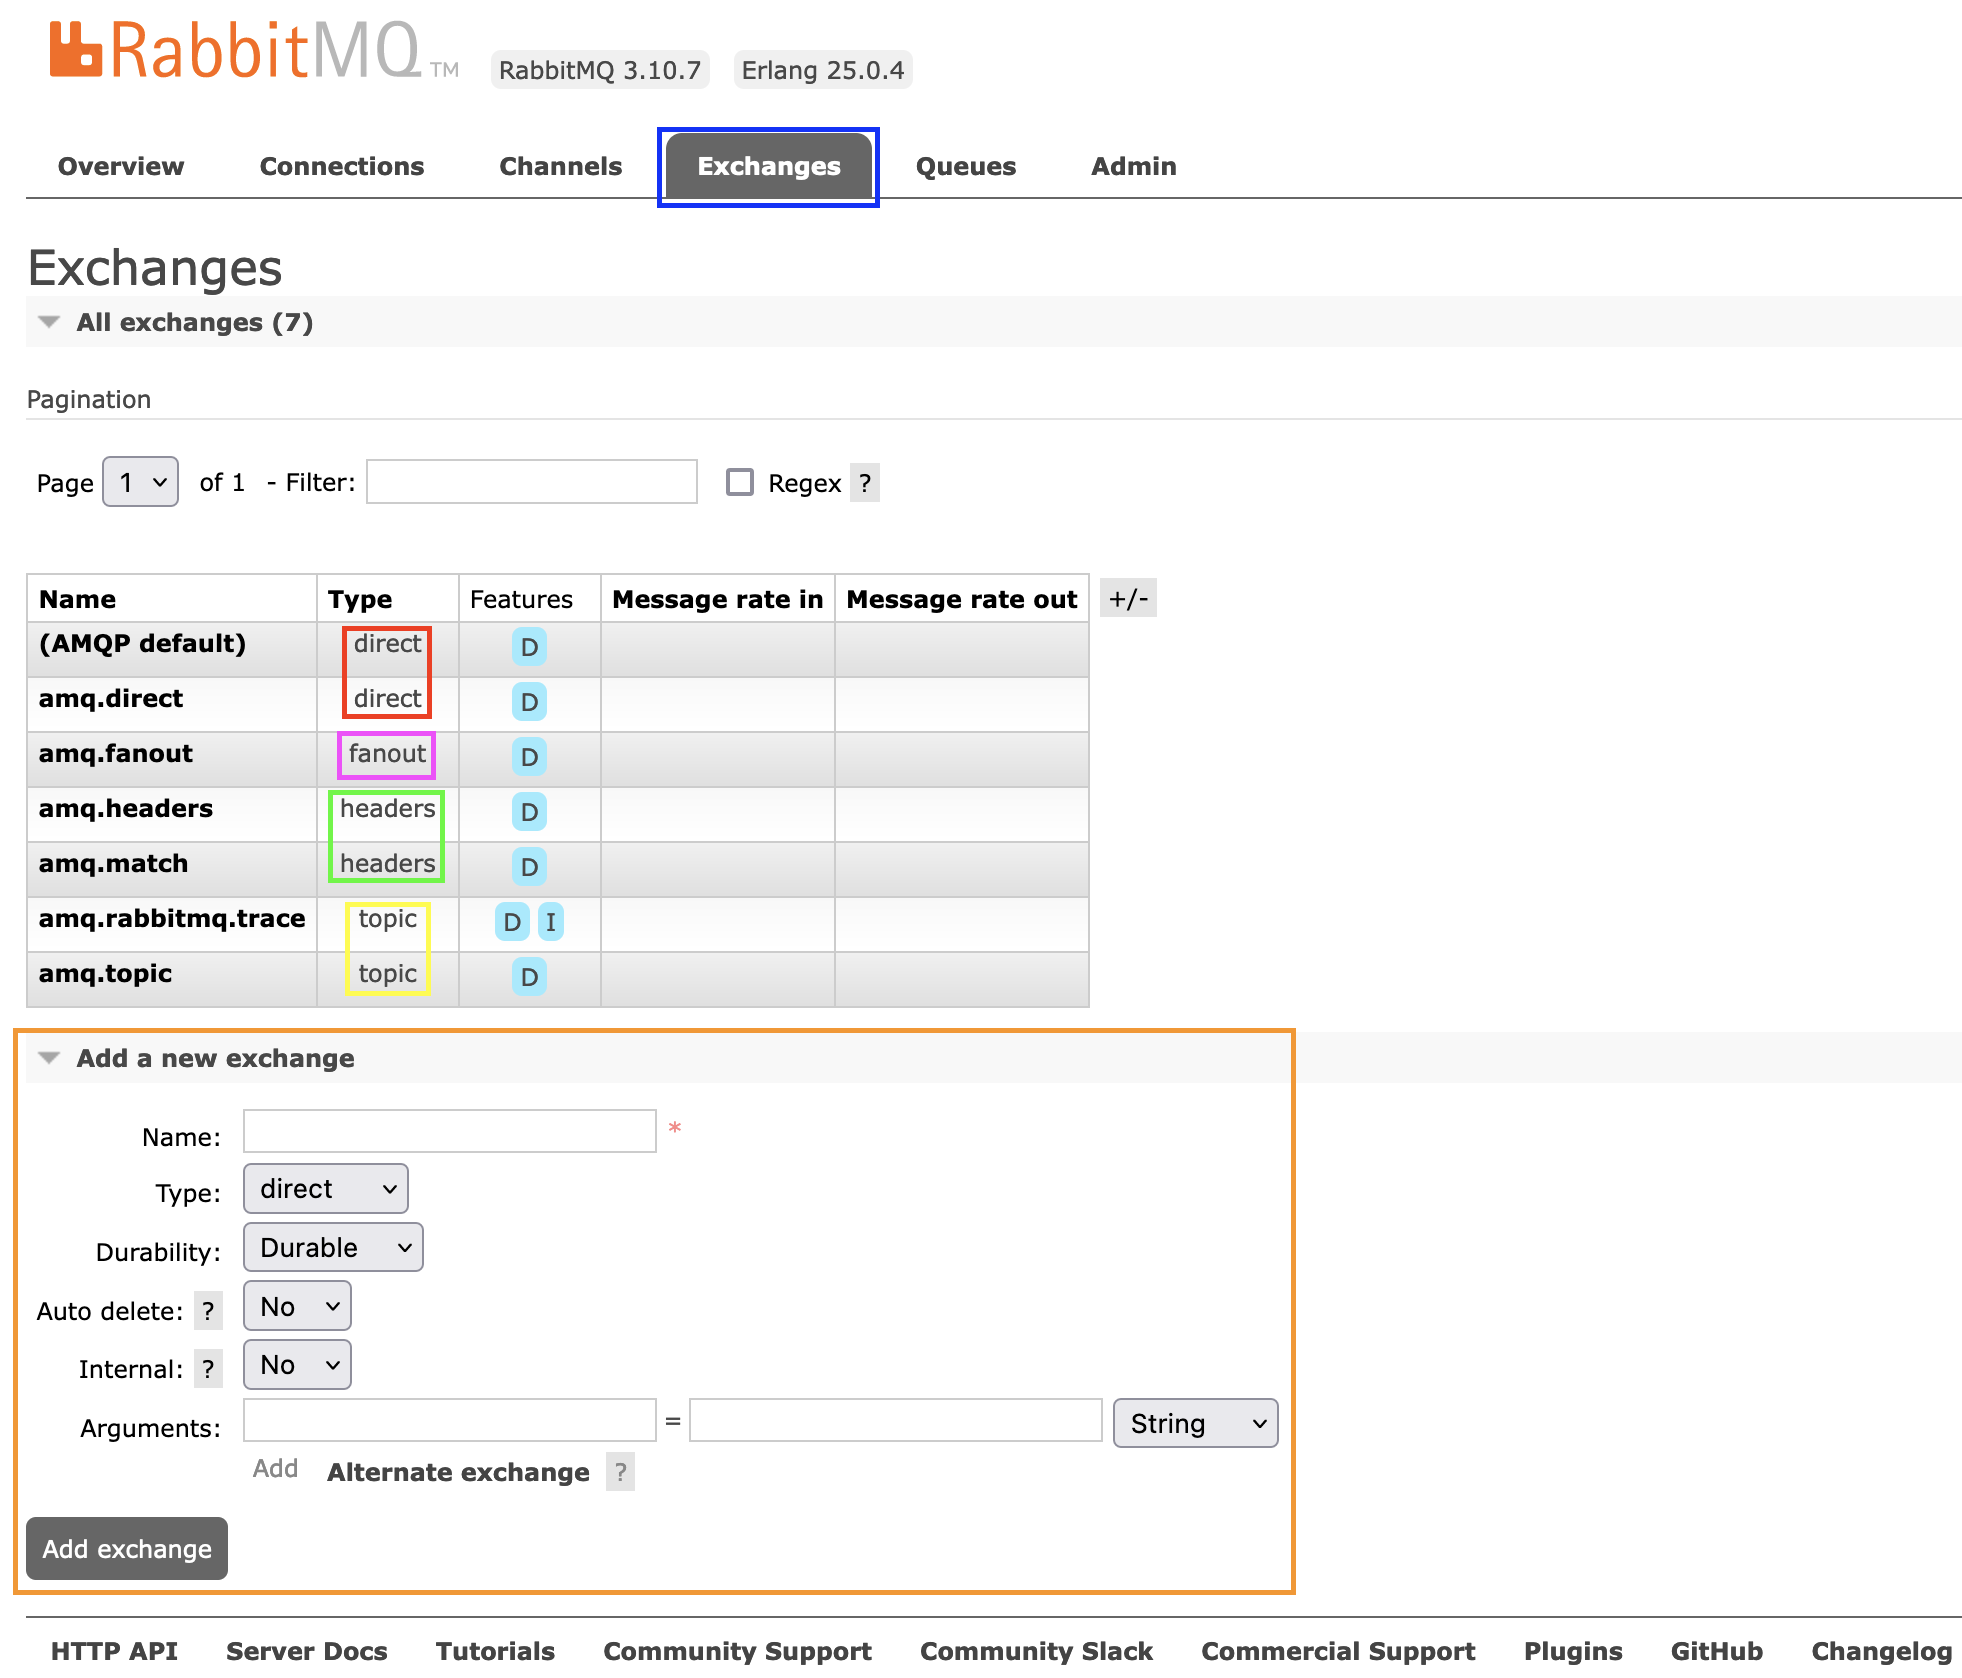
Highlighted in red, pink, green, and yellow are different types of exchange (we will only work with a direct exchange in this tutorial). We are going to set up our own exchange using the interface highlighted in orange.
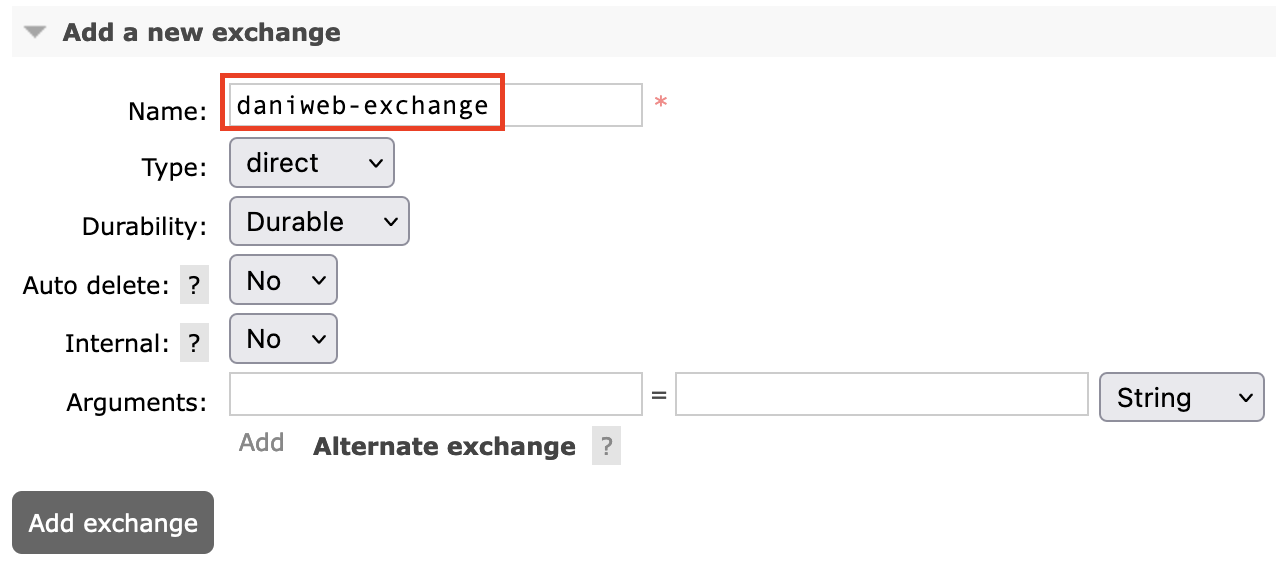
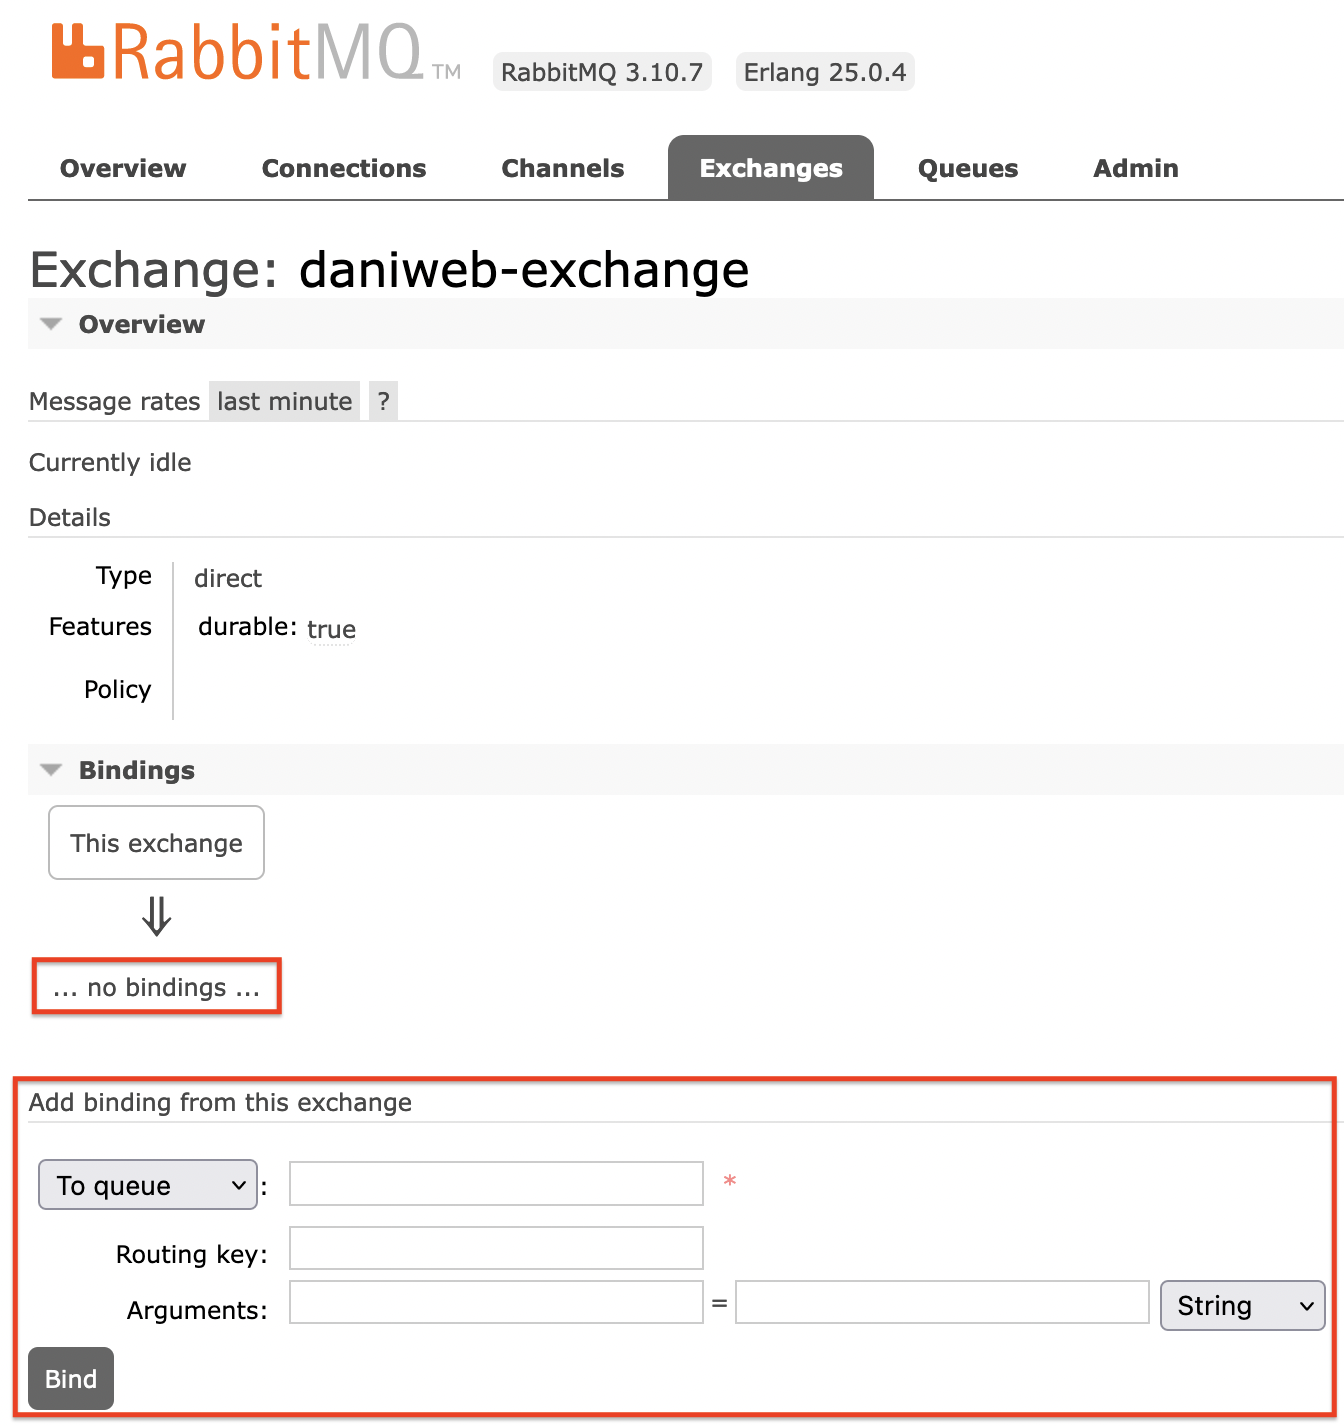
Let us add an exchange called daniweb-exchange by providing the exchange Name, leave everything as default, and select Add exchange.
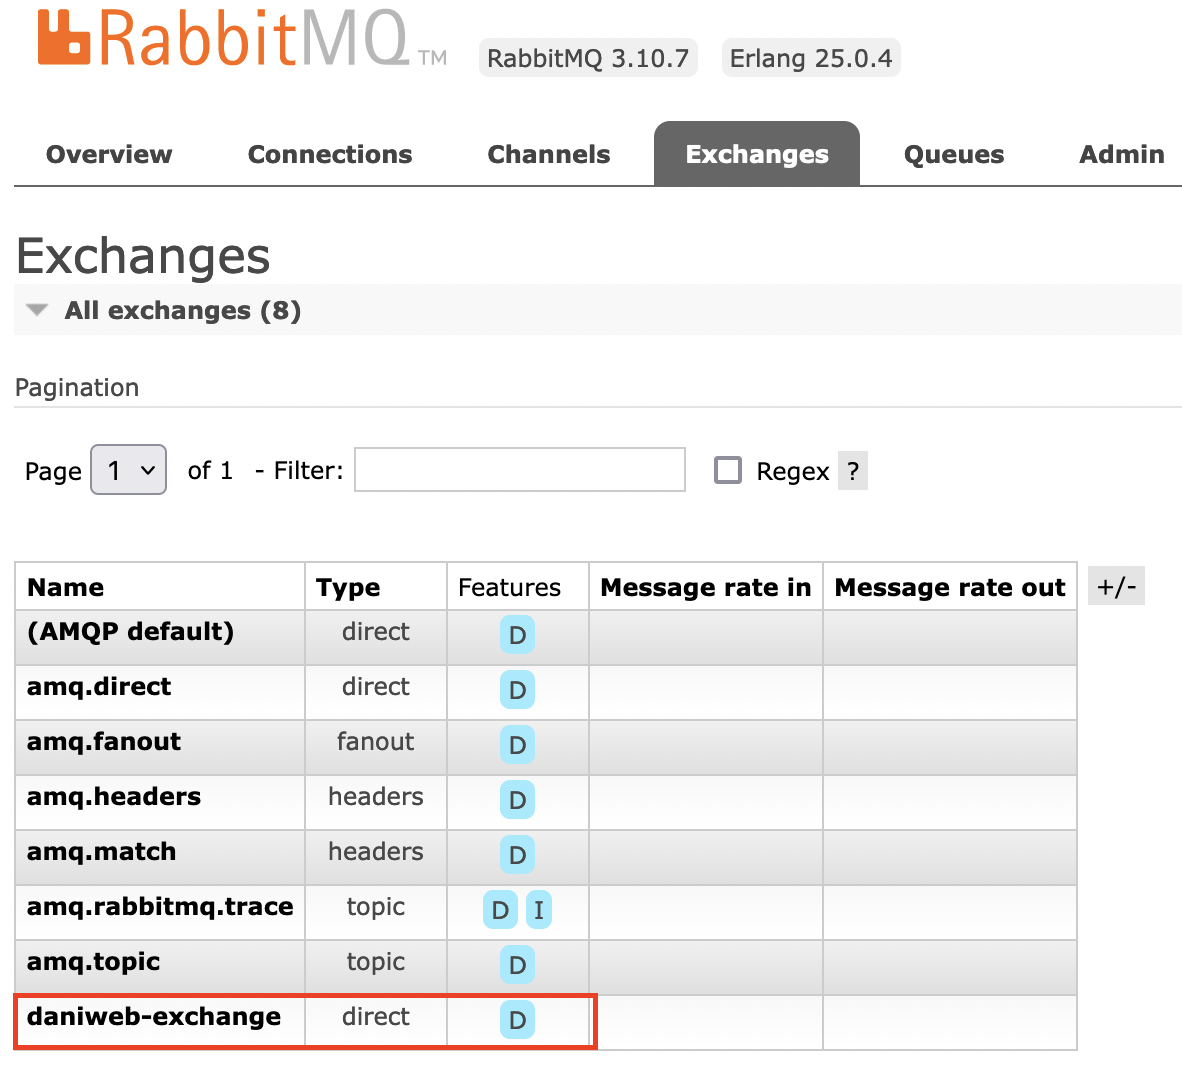
You should now see the daniweb-exchange under the exchange list. To view daniweb-exchange’s configuration, click on its name.
In the exchange configuration screen, you can see that the daniweb-exchange is currently not bound to any queue. In the next section, we will need to declare some queues, so we can bind daniweb-exchange to it.
Declaring Queues
To declare a queue, select the Queue tab, provide it a name, leave everything else as default, and then click on Add queue.
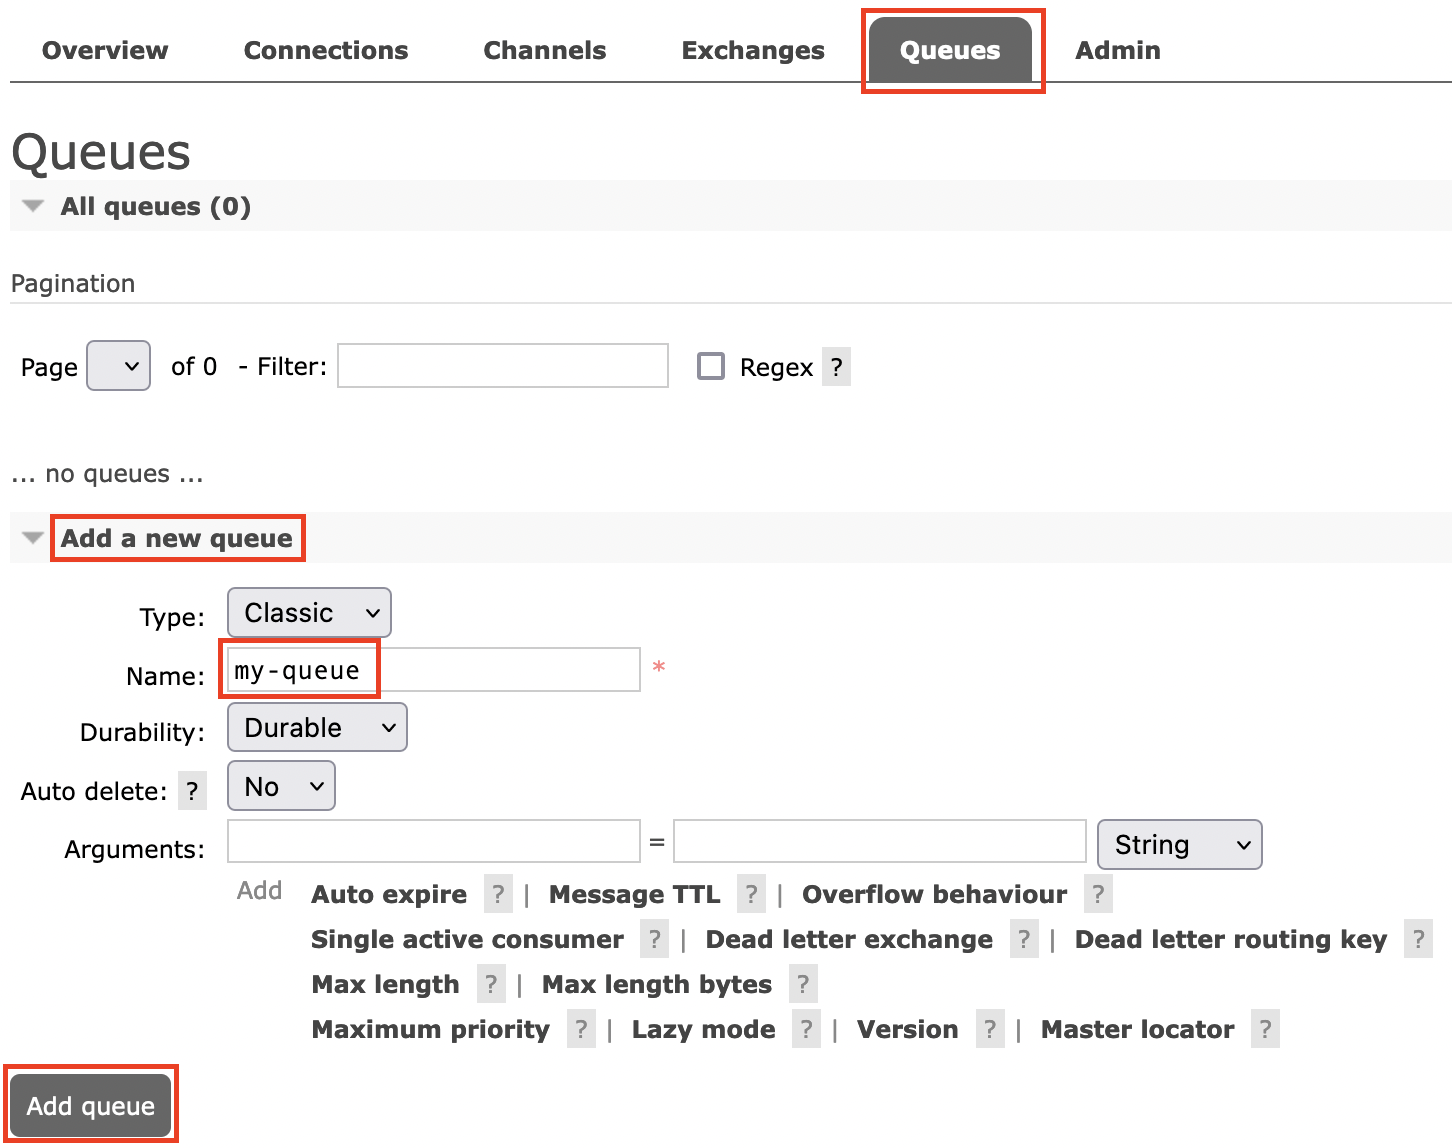
Now, click on the queue name to see its statistics and create a binding key.

The area in green shows message statistics for this queue. We have not sent any message, so there is no activity shown up here.
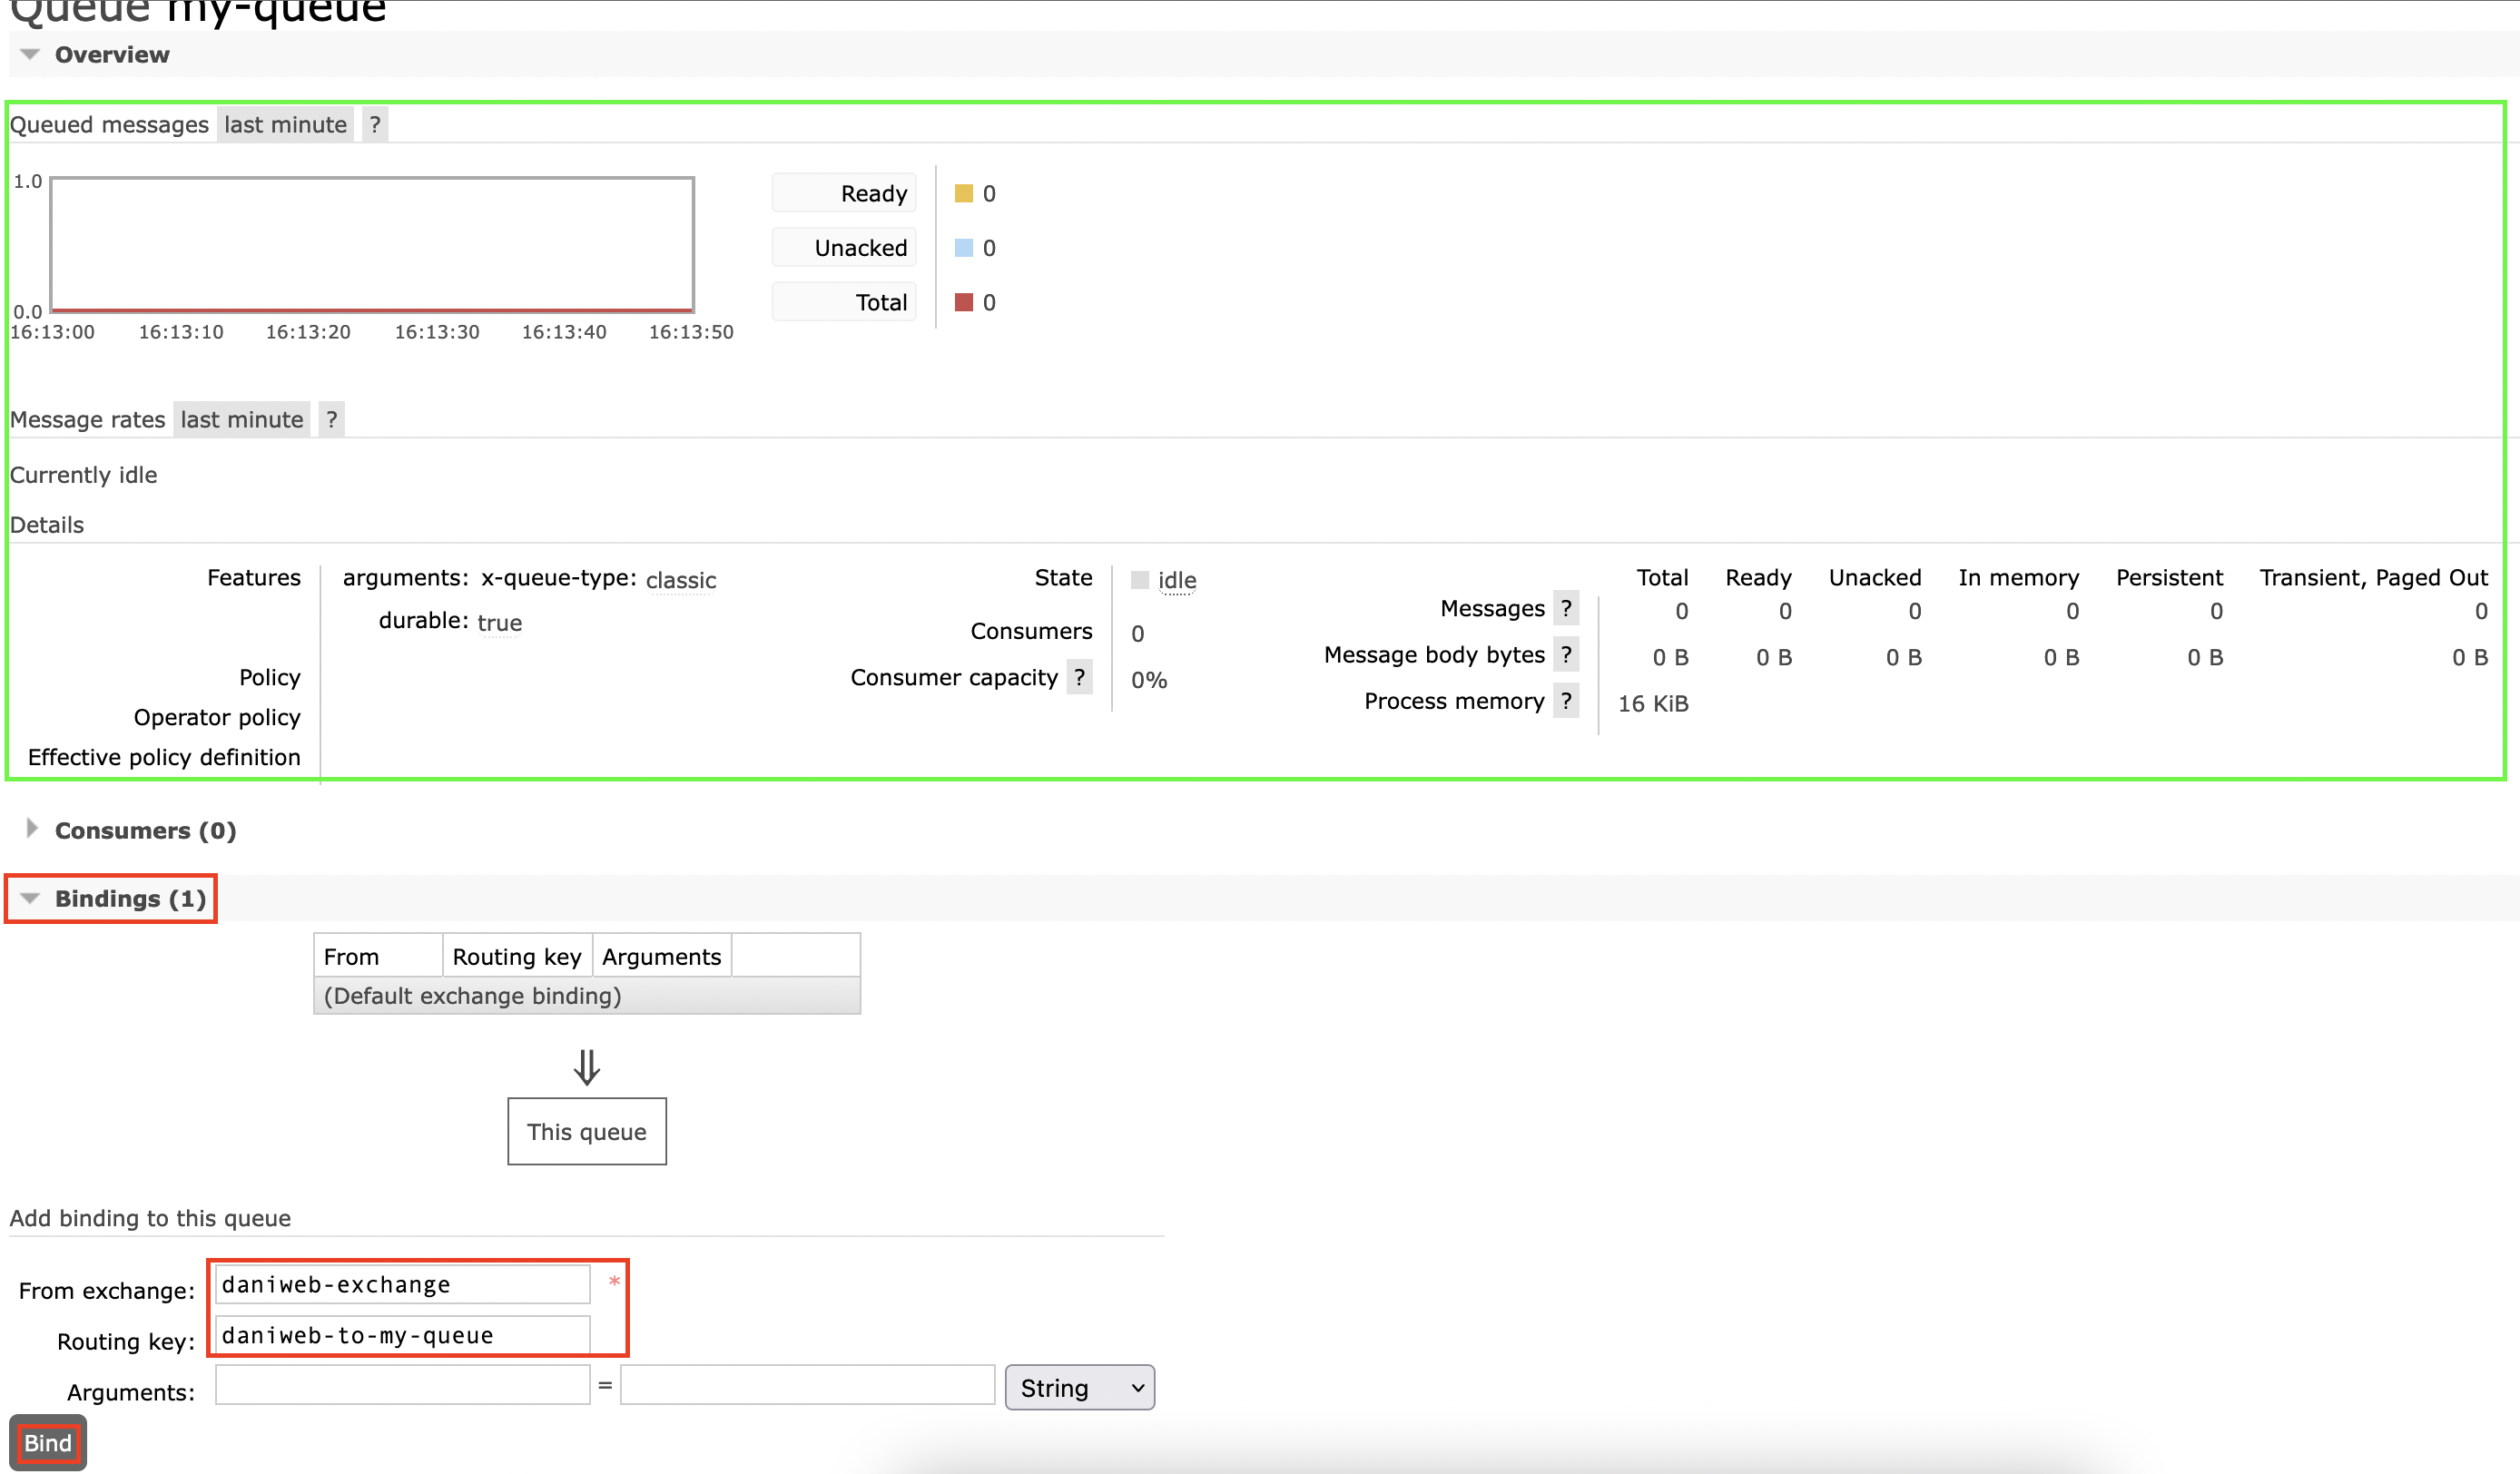
To create a binding key, you need to supply a valid exchange name (it must exists). You can name the routing key however you want. This routing key describes the relationship:
The queue my-queue is interested in messages from the daniweb-exchange.
After creating the binding key, you should see it show up under Bindings.
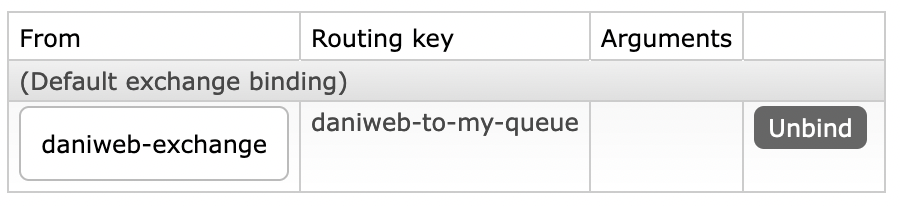
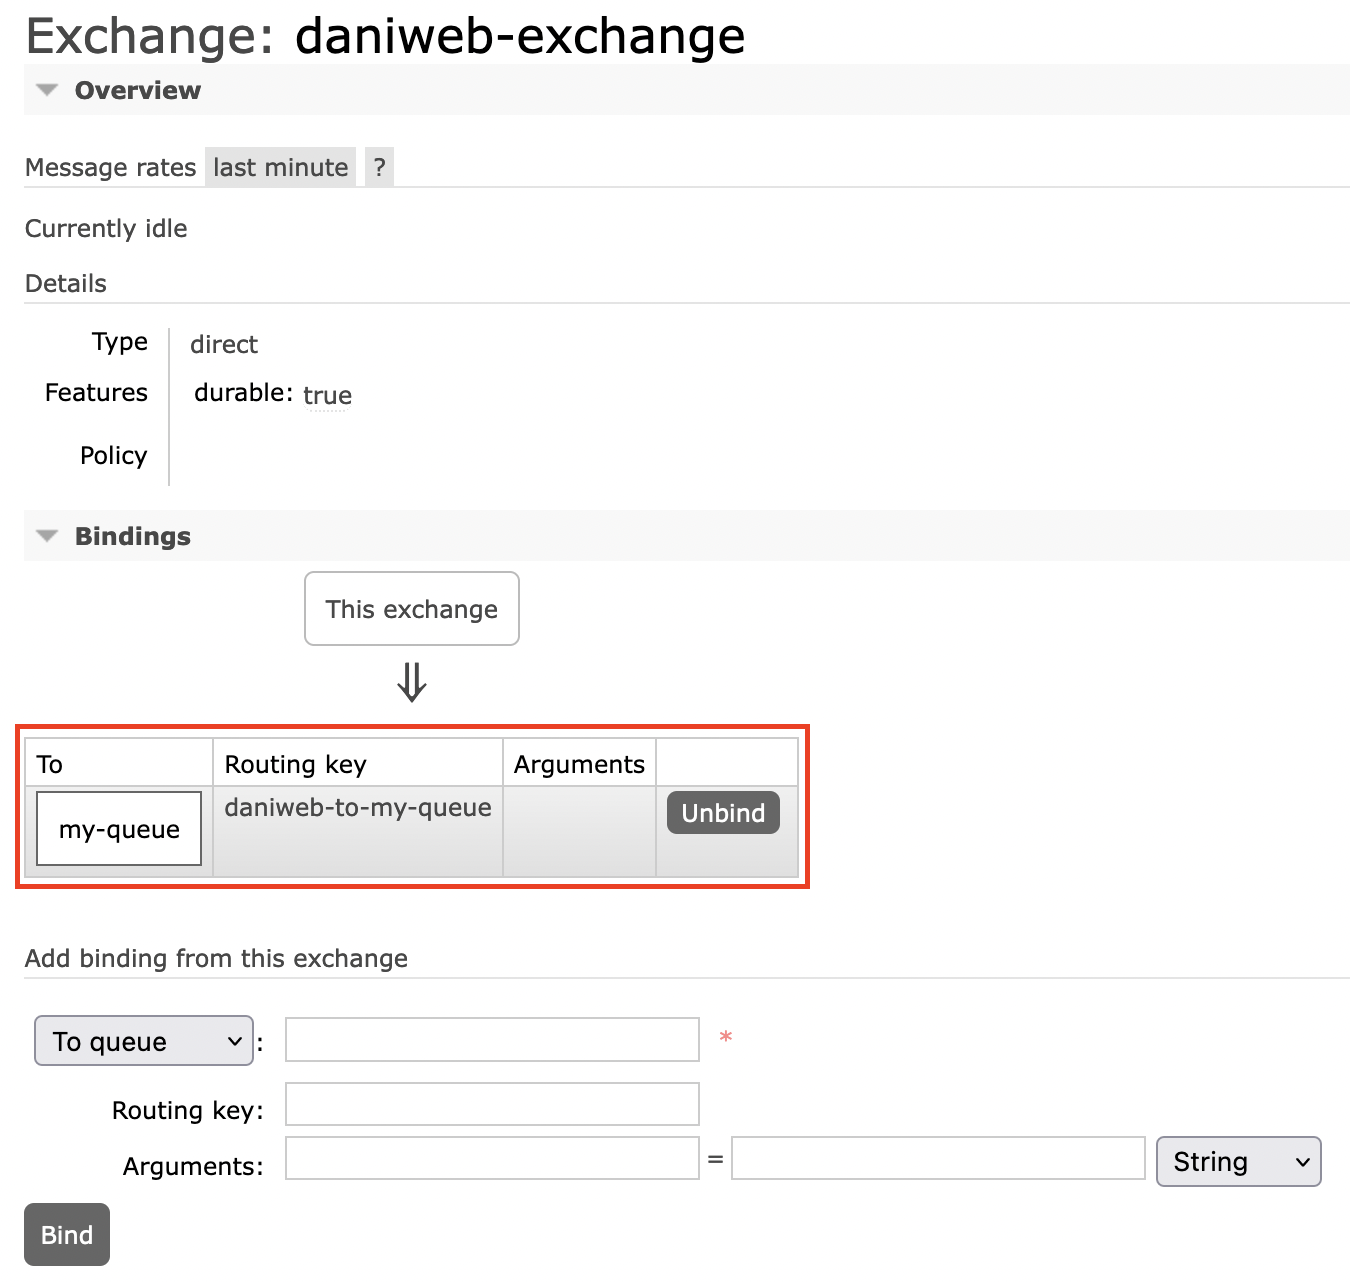
If we go back into Exchanges/daniweb-exchange, then we can see that it is already bound to my-queue, so we do not have to manually bind it ourselves in the exchange configuration anymore.
Summary
Congratulations, you have learned how to set up your own exchanges and queue in RabbitMQ in this tutorial. In the next tutorial, we will learn how to send messages via the queue created in this tutorial.