I have a Texas Instrument board and I need to make a GUI on PC and link it to my board via a serial port in order to have communication.(energy-meter calibration monitoring window)

Therefore, I decided to use Visual Studio 2010. When I started to use it I found out that let's say for the C++ parts I have the following options.
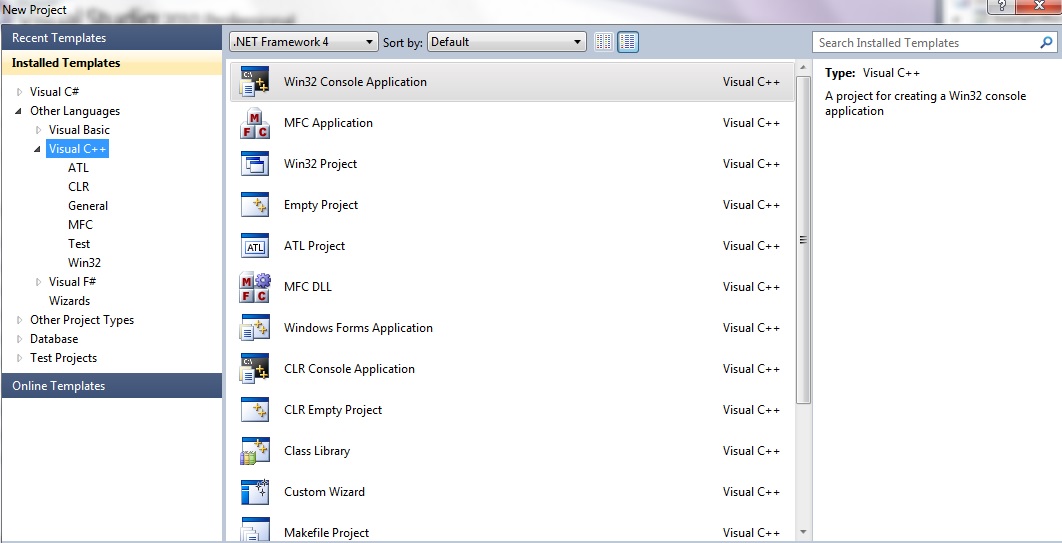
e0baf1162d5ff4607282da85f69bbe34

Also as for the c# part I have the followings.
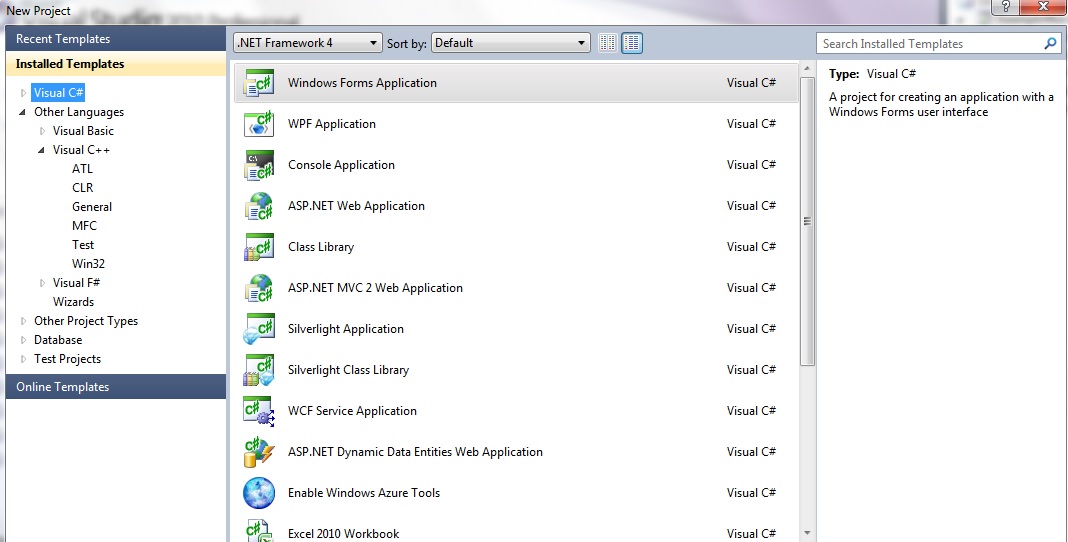
5a6d09f0f57ed48af3a97ecc80873082

This is a little bit confusing to me as I do not know which one is useful and takes less time and effort to make. I should have TX and RX command between my board and PC as well as a nice window to show my values are coming from the board.

So, in your opinion and your best experience, what would you suggest to use and you provide me with an example, that would be perfect.

Thank you.

Dani AI

Generated

Building on and , split the work into three clear layers: hardware/interface, robust communications & parsing, and the UI/visualization. For a maintainable desktop tool inside Visual Studio a modern XAML-based UI (MVVM) or a C++/Qt front end are the common tradeoffs — pick the one that matches long‑term needs (rapid UI binding vs cross‑platform/native control). Keep the communications implementation independent of the GUI so it can be tested and simulated separately.

Verify the physical layer early. Determine whether the meter board uses TTL (3.3V), RS‑232 (±V), or RS‑485 differential signalling and pick the correct adapter (USB↔TTL, RS‑232 transceiver, isolated RS‑485). For calibration work where mains is present, use galvanic isolation and proper fusing to avoid dangerous ground loops. Add a small test jig or loopback connector so the comms stack can be validated without the live DUT.

Make the protocol resilient: use framed packets (sync, length, payload, checksum), timeouts, acks/retries, and detailed hex logging with timestamps. A state‑machine parser that buffers bytes and extracts full packets is essential — keep that code small, unit‑tested and separate from UI threading. Example read/parse pattern (pseudocode):

async Task ReadLoop(ICommPort port, CancellationToken ct)
{
    var buf = new List<byte>();
    while (!ct.IsCancellationRequested)
    {
        var chunk = await port.ReadAsync(256, ct);
        buf.AddRange(chunk);
        while (TryExtractPacket(buf, out var packet))
            ProcessPacket(packet); // enqueue for UI
    }
}

In the UI layer, dispatch updates onto the UI thread and avoid blocking the message pump. Add realtime plotting (OxyPlot/LiveCharts), CSV logging, a simulation mode, and a calibration workflow that records coefficients and test metadata. Troubleshooting checklist: confirm the physical wiring and adapter, match baud/parity/data/stop bits, test loopback, watch for checksum/frame errors, and use an oscilloscope or logic analyzer if the line looks noisy.

Recommended Answers

All 2 Replies

Windows Forms is c++/CLR, which is a slightly different language than c++. c++/CLR is more like C# and VB.NET and all three are based on the .NET framework. But for quick GUI use Windows Forms. None of those options have anything to do with serial communications.

Once you have the basic GUI coded and running you can use the Serial Port class to communicate with the serial ports.

It would probably help to break your problem down into parts.

First decide what language you will be using. Since you want a GUI, using a .net language would probably be the easiest. If you have a background in c++ the c++/clr option is viable. You could also easily go with the C# option.

Before you actually do any GUI designing and work, you should probably nail down the serial communications. .net has a class for that. I would suggest starting with a console app and get the communication working.

Next once you see how the data is received and how to parse it, design a class to read the data and put it into reognizable form.

Now you know enough to design your GUI. Then it's a simple matter to interface the GUI with the class.

I know this sounds kind of complicated, but, each step builds on the step(s) before it. This helps to reduce the frustration of having to redesign everything, if you do things out of order.

Be a part of the DaniWeb community

We're a friendly, industry-focused community of developers, IT pros, digital marketers, and technology enthusiasts meeting, networking, learning, and sharing knowledge.