Photoshop Lesson 1 - Simple, nice looking button
Difficulty: 2/10 - Meaning you should have some Photoshop Experience
After this lesson, you will be able to create, a simple, good looking button in no time.
1.) Create a canvas of 359x33. (CTRL+N or Apple+N)
2.) Create a new layer (this will be for our base colour - Name it accordingly)
3.) Fill the newly created layer with a nice colour (can always change it later) for this lesson I'm going to use #024f90.
--- Phew. that was the fun part, now we going to start getting a little more professional and start applying gradients ---
NB: New to photoshop? Look at attached images if you get last at any point.
4.) Select you marquee tool (M) and use it to select the top half of your canvas.
[Image - 1a.jpg]
5.) Create a new layer, fill it with white. Ensure you havent lost your selection.
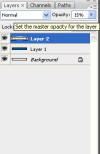
6.) Set the layers opacity to 15%.
[Image - 1b.jpg]
7.) Create another new layer
8.) Select the gradient tool (G)
9.) Double click on the gradient editor.
[Image - 1c.jpg]
10.) Create a new gradient that is white with one opacity stop that is centered and transparent.
[Image - 1d.jpg]
11.) Apply your new gradient to the layer you just created. Drag the tool, from the bottom of your canvas to the top.
12.) If you follwed the steps correctly you should end up with something like this.
[Image - 2a.jpg]
--- Thats it ---
Now, you don't have to stop there! Play with the opacity of your layer with the gradient. Apply a colour over-lay to the base colour. It doesn't end here, photoshop is all about experimenting. So go for it.


