dimitrilc 30 Junior Poster
Introduction

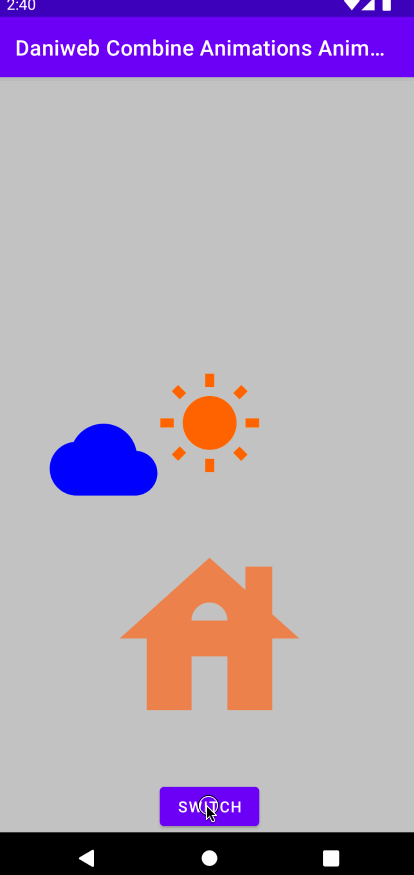
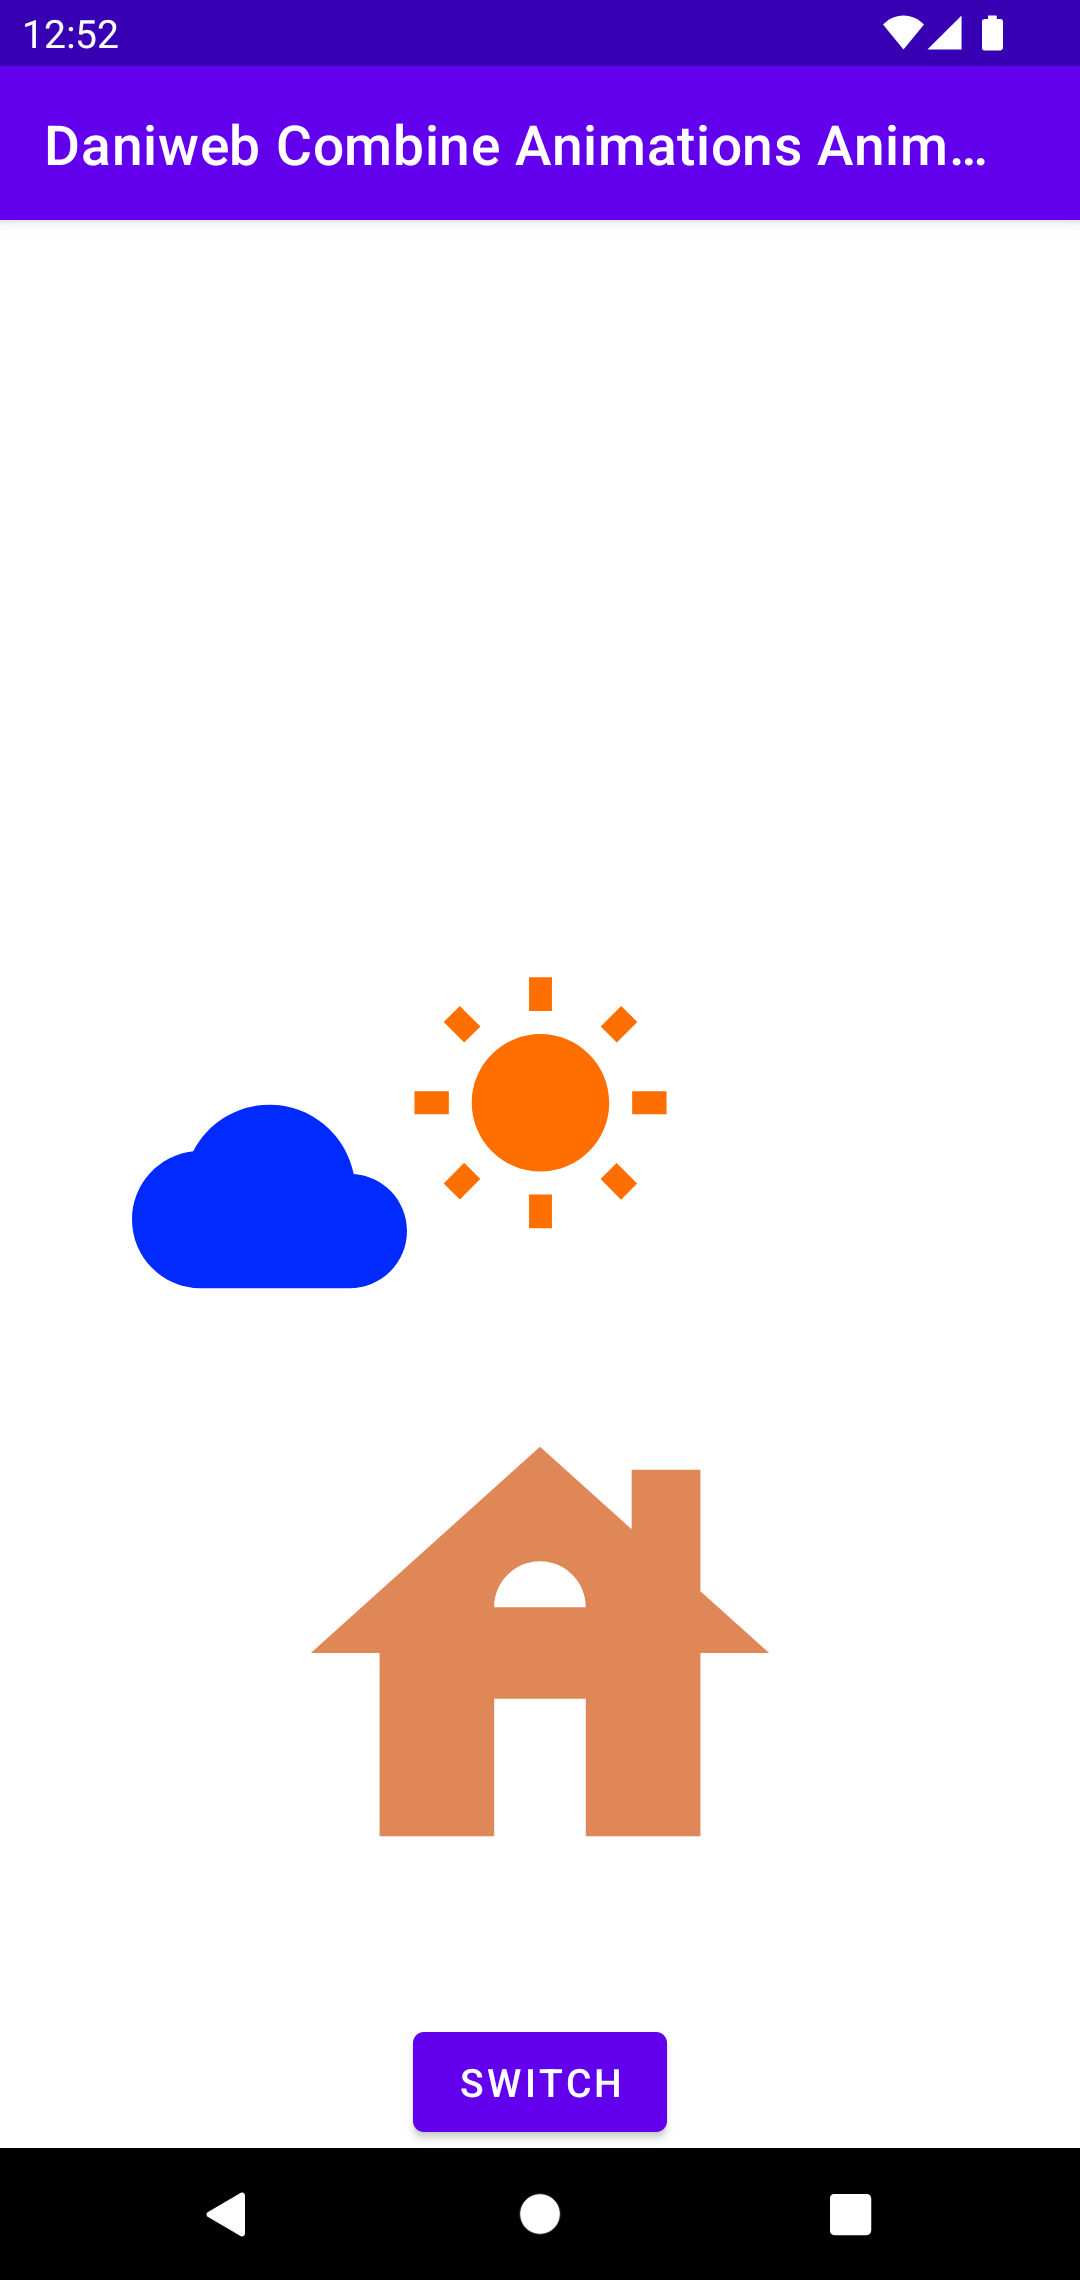
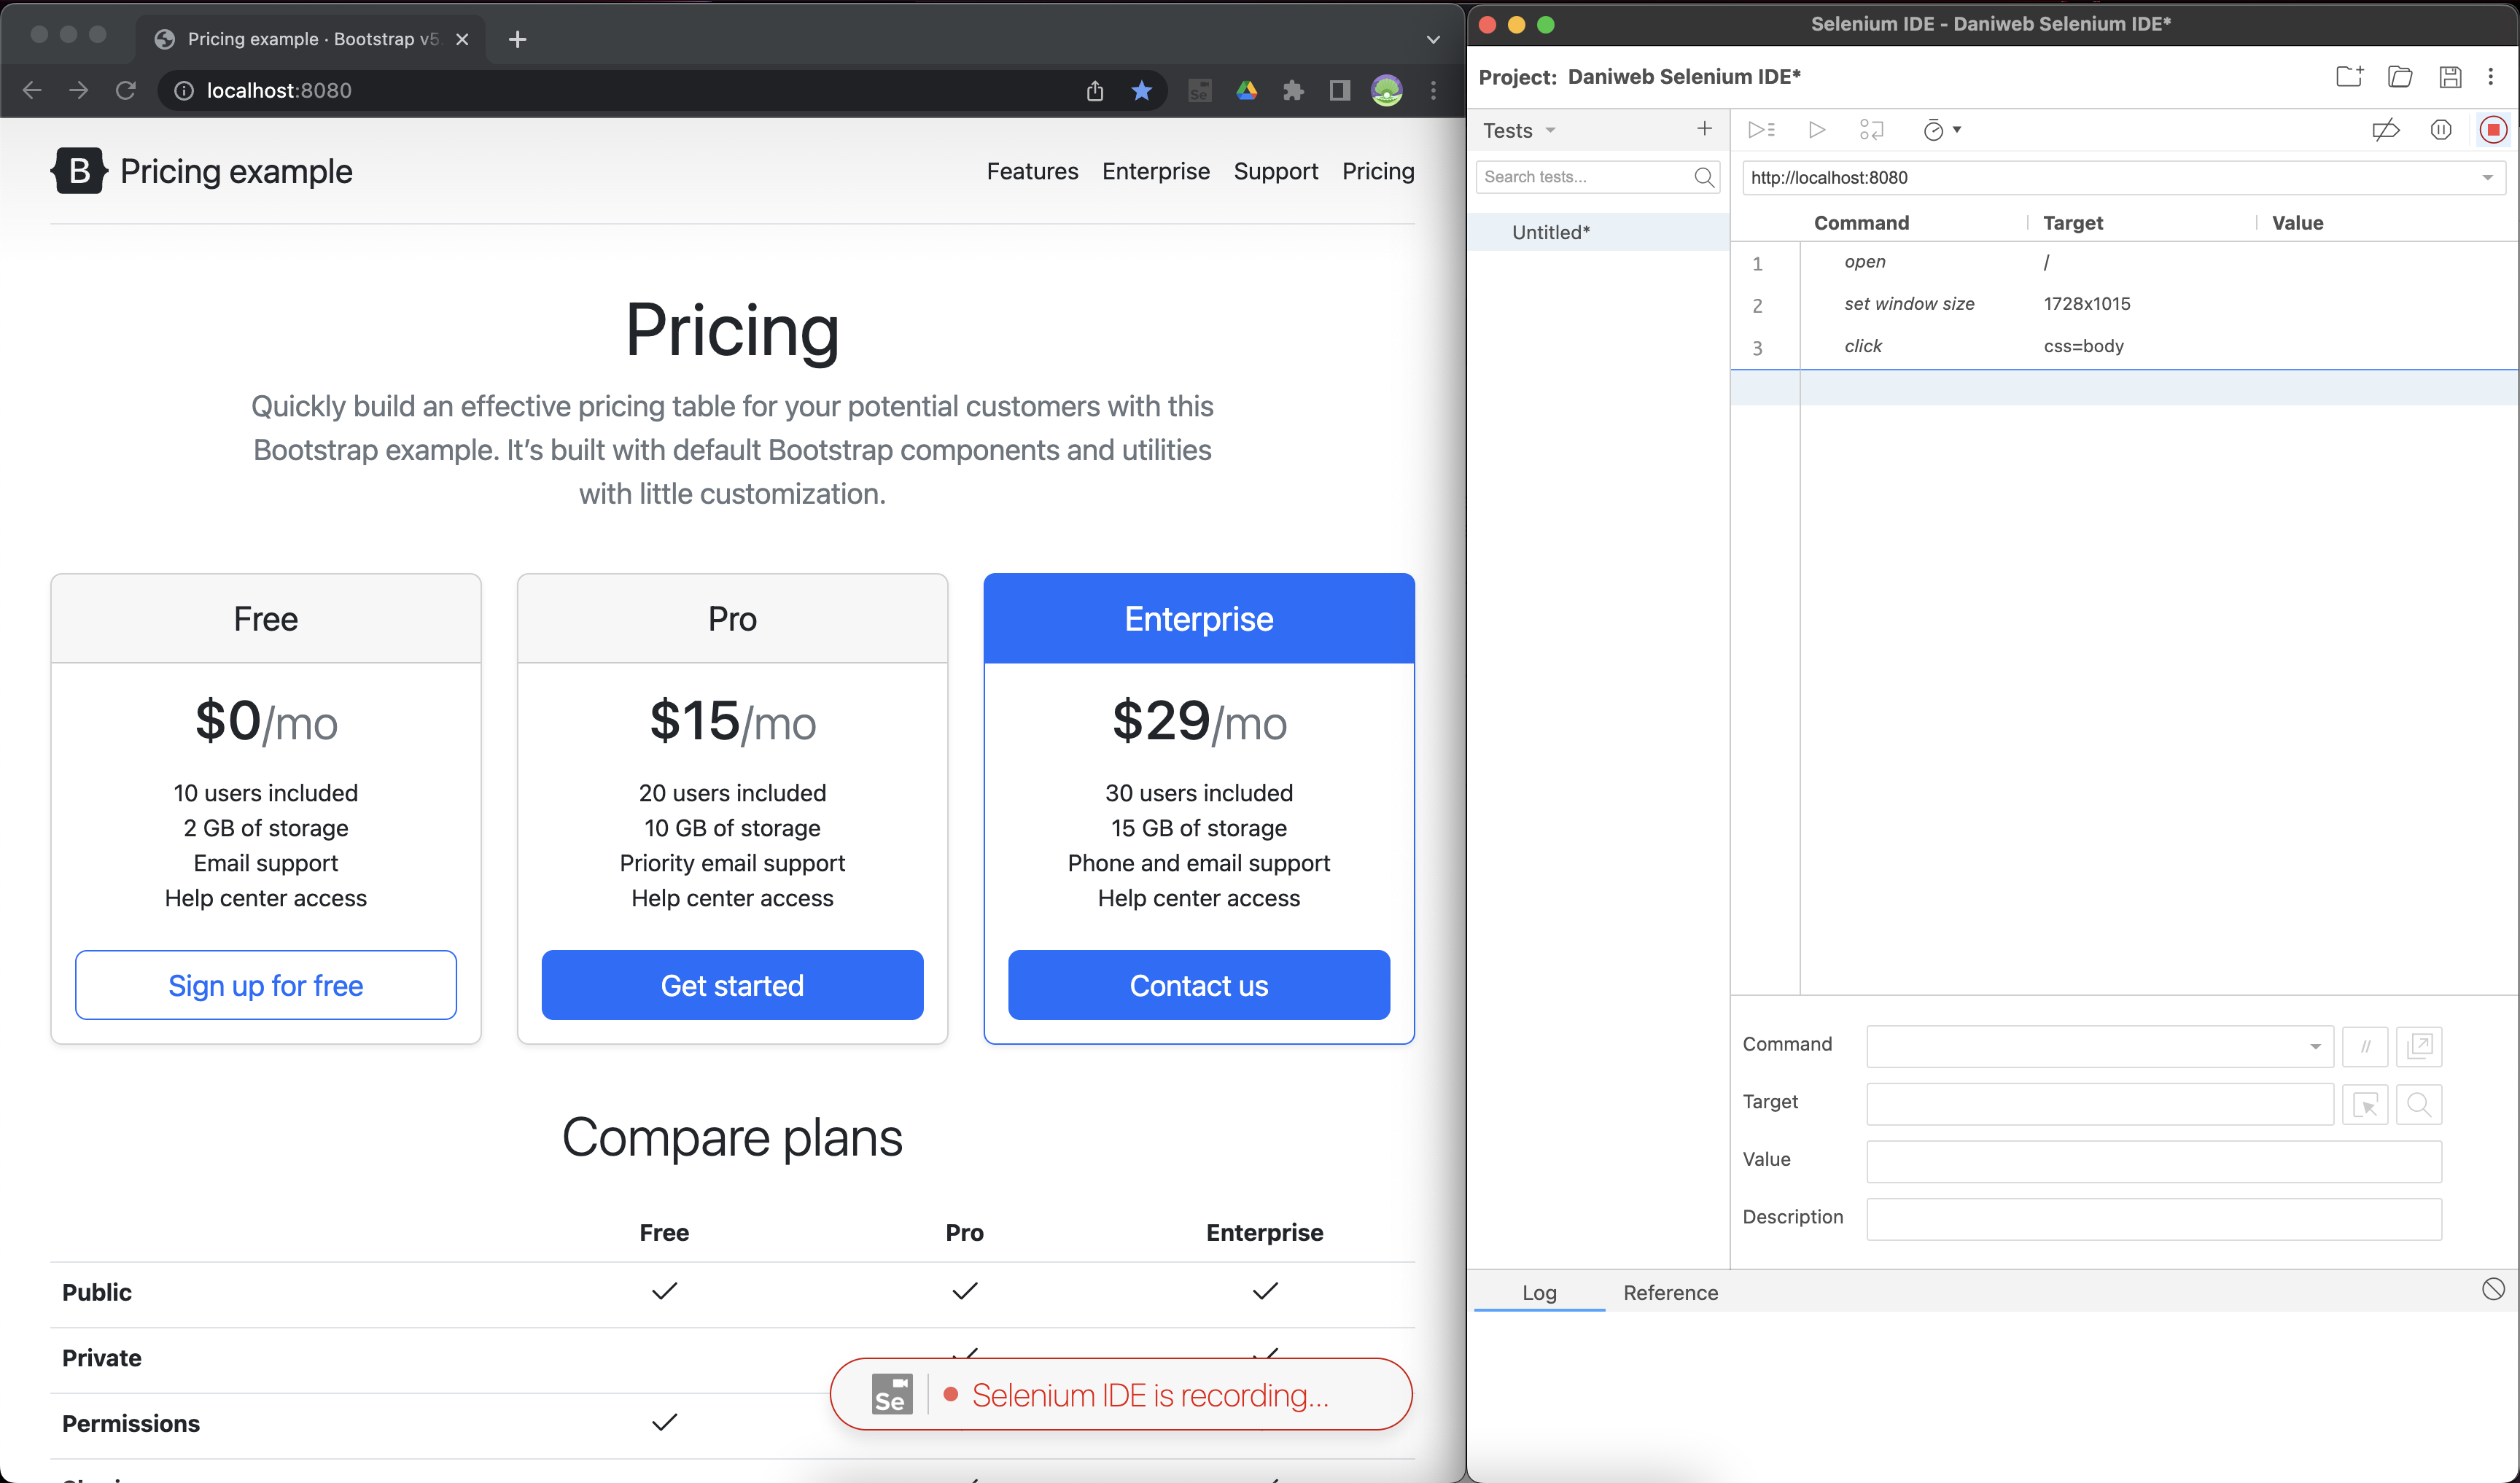
In a previous tutorial, we learned how to create a notification on Android. In that tutorial, we did not have to request any permission because applications did not need permission to post notifications on Android 12 and below.

It has been almost a year since the release of that tutorial and Android 13 came along, bringing with it some important changes. Starting on Android 13 (Android API level 33), most applications will have notifications turned off by default.

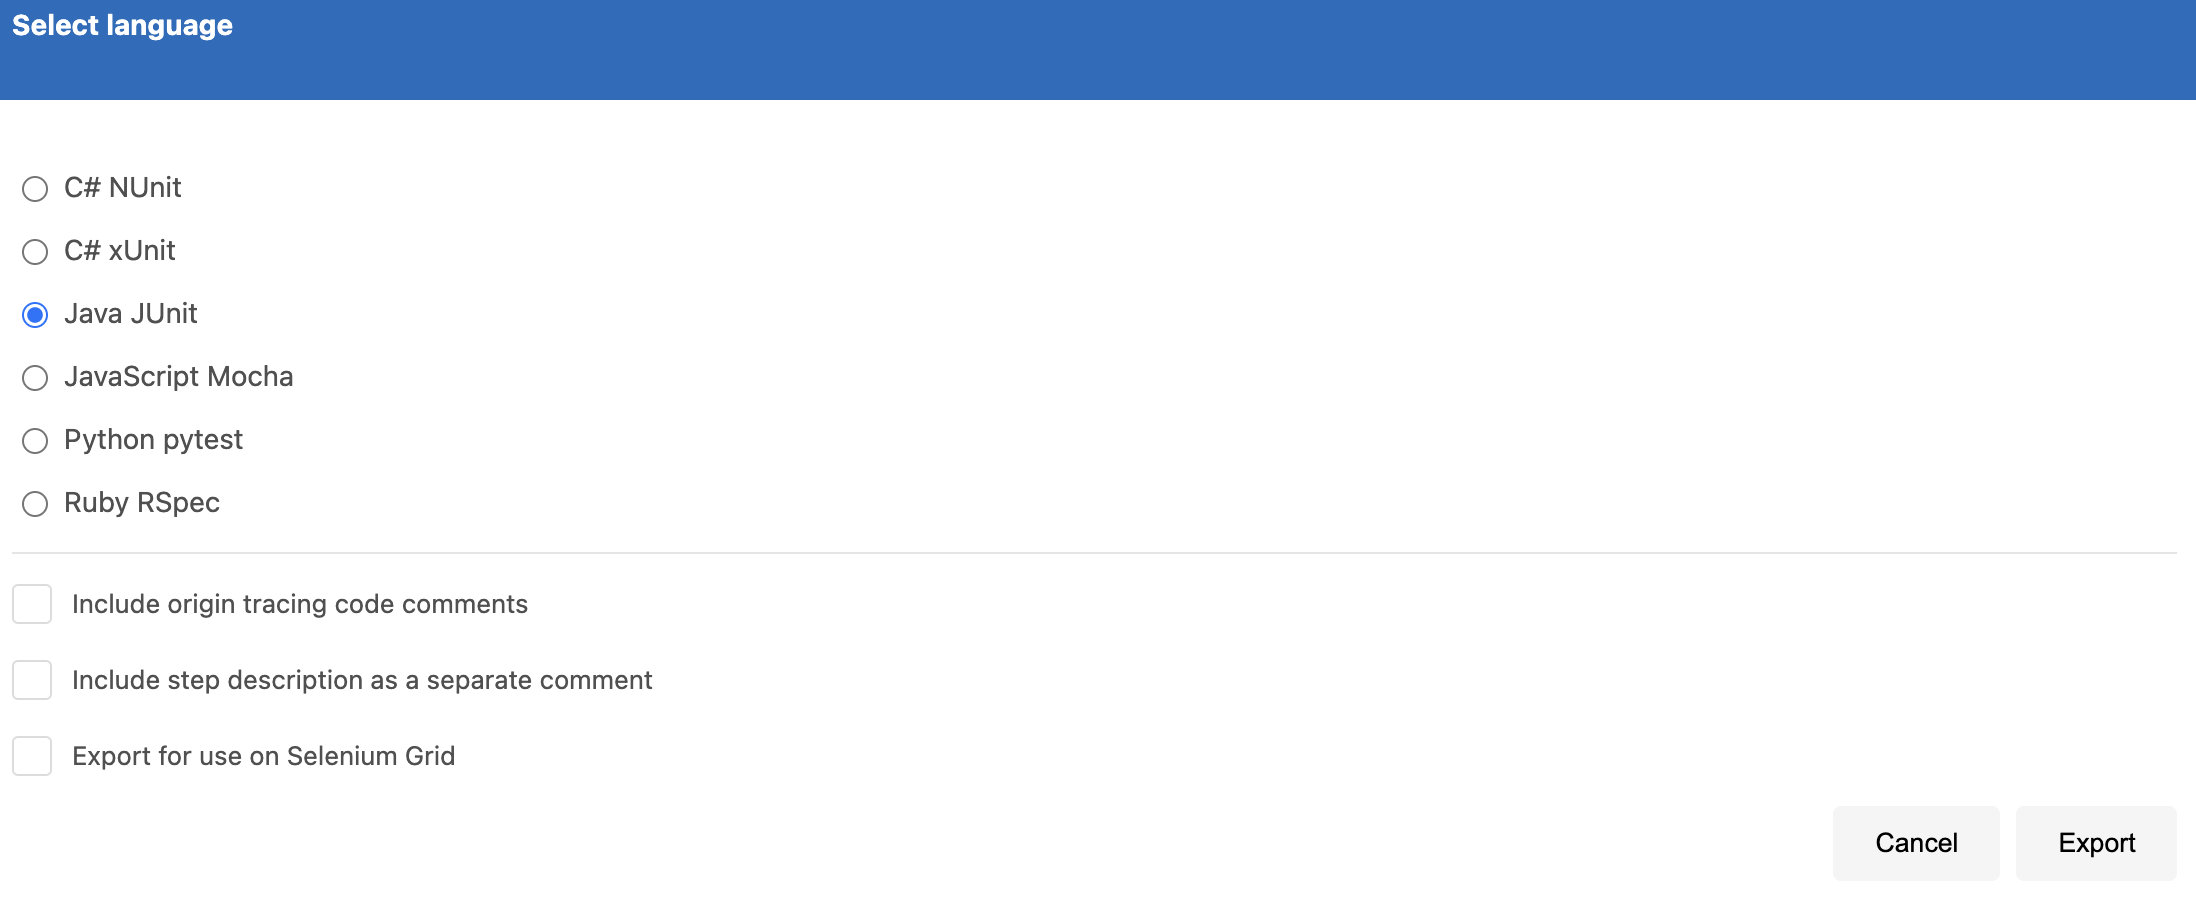
In this tutorial, we will learn how to request permission from the user to turn on notification permission.

Goals

At the end of the tutorial, you would have learned:

  1. How to request notification permission on Android 13+.
Tools Required
  1. Android Studio. The version used in this tutorial is Android Studio Dolphin | 2021.3.1 Patch 1.
Prerequisite Knowledge
  1. Intermediate Android.
  2. Notification Basics.
Project Setup

To follow along with the tutorial, perform the steps below:

  1. Create a new Android project with the default Empty Activity.

  2. In the module build.gradle file, change the compileSdk and targetSdk to 33.

  3. Add the vector asset below as ic_baseline_notifications_24.xml into the project’s drawable directory. This will be used as the notification icon.

     <vector android:height="24dp" android:tint="#000000"
        android:viewportHeight="24" android:viewportWidth="24"
        android:width="24dp" xmlns:android="http://schemas.android.com/apk/res/android">
        <path android:fillColor="@android:color/white" android:pathData="M12,22c1.1,0 2,-0.9 2,-2h-4c0,1.1 0.89,2 2,2zM18,16v-5c0,-3.07 -1.64,-5.64 -4.5,-6.32L13.5,4c0,-0.83 -0.67,-1.5 -1.5,-1.5s-1.5,0.67 -1.5,1.5v0.68C7.63,5.36 6,7.92 6,11v5l-2,2v1h16v-1l-2,-2z"/>
     </vector>
  4. Add the strings below into your project’s strings.xml file.

     <string name="channel_id">123</string>
     <string name="channel_name">My Channel Name</string>
     <string name="notification_title">My …
dimitrilc 30 Junior Poster
Introduction

In a previous tutorial, we learned how to set an exact alarm. A permission called SCHEDULE_EXACT_ALARM was used in that tutorial. Initially, I thought that it was only a normal install-time permission, but I have recently found out that this specific permission also belongs to a rare type of permission called special app access permission.

“Special app access” permissions do not usually work like other permission types (how to request, revoke, other specific behaviors). It is also hard to find in the Android Settings. Let us use the Clock app for example. In the following screenshot, it does not show alarm as a permission.

Screenshot_2022-11-09_at_12.44.05_PM.png

To be able to see the “special app access” permission, you will have to scroll down further.

Screenshot_2022-11-09_at_12.45.34_PM.png

In this tutorial, we will learn how to work with the SCHEDULE_EXACT_ALARM permission in the following scenarios:

  1. How to check for permission.
  2. How to request for the permission.
Goals

At the end of the tutorial, you would have learned:

  1. How to check for SCHEDULE_EXACT_ALARM permission.
  2. How to request for the SCHEDULE_EXACT_ALARM permission.
Tools Required
  1. Android Studio. The version used in this tutorial is Android Studio Dolphin | 2021.3.1 Patch 1.
Prerequisite Knowledge
  1. Intermediate Android.
  2. Basic permissions.
Project Setup

To follow along with the tutorial, perform the steps below:

  1. Create a new Android project with the default Empty Activity.

  2. Declare the permission below in the manifest.

     <uses-permission android:name="android.permission.SCHEDULE_EXACT_ALARM"/>
dimitrilc 30 Junior Poster
Introduction

When working with ViewModels, instead of using the default, it is best practice that we inject coroutine dispatchers instead of hard-coding them. The reasoning behind this is that it is easier to switch to a testable dispatcher in tests.

In this tutorial, we will learn how to inject coroutine Dispatchers using Hilt.

Goals

At the end of the tutorial, you would have learned:

  1. How to inject coroutine dispatchers into ViewModels.
Tools Required
  1. Android Studio. The version used in this tutorial is Android Studio Dolphin | 2021.3.1 Patch 1.
Prerequisite Knowledge
  1. Hilt basics.
  2. ViewModel basics.
  3. Intermediate Android.
  4. Coroutine basics.
Project Setup

To follow along with the tutorial, perform the steps below:

  1. Create a new Android project with the default Empty Activity.

  2. Add a new ViewModel called MyViewModel.

     class MyViewModel : ViewModel() {
    
     }
  3. Add the Hilt plugin into the project build.gradle.

     id 'com.google.dagger.hilt.android' version '2.44' apply false
  4. Add the following plugins into your module build.gradle.

     id 'kotlin-kapt'
     id 'com.google.dagger.hilt.android'
  5. Add the dependencies below into your module build.gradle.

     implementation "com.google.dagger:hilt-android:2.44"
     kapt "com.google.dagger:hilt-compiler:2.44"
     implementation 'androidx.activity:activity-ktx:1.5.0'
  6. Add the Hilt application class into your project.

     @HiltAndroidApp
     class MyApplication : Application() {
     }
  7. Add the application class into the manifest, inside the <application> tag.

     android:name=".MyApplication"
  8. In MainActivity, add the property below.

     val myViewModel: MyViewModel by viewModels()
Avoid Hard-Coding Coroutine Dispatchers In ViewModels

Let us …

dimitrilc 30 Junior Poster
Introduction

When working with RecyclerView, sometimes we are required to scroll the RecyclerView in code, especially after addition of a list item.

In this tutorial, we will learn how to scroll to specific positions on a RecyclerView.

Goals

At the end of the tutorial, you would have learned:

  1. How to programmatically scroll on a RecyclerView.
Tools Required
  1. Android Studio. The version used in this tutorial is Android Studio Dolphin | 2021.3.1 Patch 1.
Prerequisite Knowledge
  1. Basic Android.
  2. Basic RecyclerView.
Project Setup

To follow along with the tutorial, perform the steps below:

  1. Create a new Android project with the default Empty Activity.

  2. Add these string resources into your project.

     <string name="add_first">Add First</string>
     <string name="add_last">Add Last</string>
  3. Replace the code in activity_main.xml with the code below. This adds a RecyclerView and two buttons.

     <?xml version="1.0" encoding="utf-8"?>
     <androidx.constraintlayout.widget.ConstraintLayout xmlns:android="http://schemas.android.com/apk/res/android"
        xmlns:app="http://schemas.android.com/apk/res-auto"
        xmlns:tools="http://schemas.android.com/tools"
        android:layout_width="match_parent"
        android:layout_height="match_parent"
        tools:context=".MainActivity">
    
        <androidx.recyclerview.widget.RecyclerView
            android:id="@+id/recyclerView"
            android:layout_width="wrap_content"
            android:layout_height="0dp"
            app:layoutManager="androidx.recyclerview.widget.LinearLayoutManager"
            app:layout_constraintBottom_toTopOf="@id/button_addFirst"
            app:layout_constraintEnd_toEndOf="parent"
            app:layout_constraintStart_toStartOf="parent"
            app:layout_constraintTop_toTopOf="parent">
    
        </androidx.recyclerview.widget.RecyclerView>
    
        <Button
            android:id="@+id/button_addFirst"
            android:layout_width="wrap_content"
            android:layout_height="wrap_content"
            android:text="@string/add_first"
            app:layout_constraintBottom_toBottomOf="parent"
            app:layout_constraintEnd_toStartOf="@+id/button_addLast"
            app:layout_constraintHorizontal_bias="0.5"
            app:layout_constraintStart_toStartOf="parent" />
    
        <Button
            android:id="@+id/button_addLast"
            android:layout_width="wrap_content"
            android:layout_height="wrap_content"
            android:text="@string/add_last"
            app:layout_constraintBottom_toBottomOf="parent"
            app:layout_constraintEnd_toEndOf="parent"
            app:layout_constraintHorizontal_bias="0.5"
            app:layout_constraintStart_toEndOf="@+id/button_addFirst" />
     </androidx.constraintlayout.widget.ConstraintLayout>
  4. Create new simple Adapter for RecyclerView using the code below.

     class MyAdapter(private val data: List<String>) : RecyclerView.Adapter<MyAdapter.MyViewHolder>() {
        class MyViewHolder(itemView: View) : ViewHolder(itemView){
            val textView: TextView = itemView.findViewById(R.id.textView_item)
        }
    
        override fun onCreateViewHolder(parent: ViewGroup, viewType: Int): MyViewHolder {
            val itemView = LayoutInflater.from(parent.context)
                .inflate(R.layout.my_view_holder, parent,false)
    
            return MyViewHolder(itemView)
        }
    
        override fun onBindViewHolder(holder: MyViewHolder, position: Int) {
            holder.textView.text = data[position]
        }
    
        override fun getItemCount() = data.size …
dimitrilc 30 Junior Poster
Introduction

Taking what we already learned from the previous tutorials about drawing custom shapes and animating along elements along a Path. In this tutorial, we will combine what we learned about animation so far to create an alternating Yin Yang symbol.

To those unfamiliar with the Yin Yang symbol, let us quickly visit the anatomy of the Yin Yang symbol itself.

YinYangExplanation.jpg

Based on the information from Wikipedia, in the Yin Yang symbol, Yin refers to the dark side, while Yang refers to the brightside.

For the rest of the tutorial, the following terms will be used:
Yin: the dark side.
Yang: the bright side.
Yin Dot: the black dot contained in the Yang side.
Yang Dot: the white dot contained in the Yin side.
Yin Yang Curve: the S-shaped curve that separates the Yin and the Yang.

Goals

At the end of the tutorial, you would have learned:

  1. How to animate an alternating Yin Yang symbol.
Tools Required
  1. Android Studio. The version used in this tutorial is Android Studio Dolphin | 2021.3.1.
Prerequisite Knowledge
  1. Intermedia Android.
  2. Basic Android animation.
  3. Custom Drawable.
  4. Custom Path.
Project Setup

To follow along with the tutorial, perform the steps below:

  1. Create a new Android project with the default Empty Activity.

  2. Replace the code inside activity_main.xml with the code below.

     <?xml version="1.0" encoding="utf-8"?>
     <androidx.constraintlayout.widget.ConstraintLayout xmlns:android="http://schemas.android.com/apk/res/android"
        xmlns:app="http://schemas.android.com/apk/res-auto"
        xmlns:tools="http://schemas.android.com/tools"
        android:background="@color/teal_200"
        android:layout_width="match_parent"
        android:layout_height="match_parent"
        tools:context=".MainActivity">
    
        <ImageView
            android:id="@+id/yin_yang_background"
            android:layout_width="match_parent"
            android:layout_height="0dp"
            app:layout_constraintDimensionRatio="1:1"
            app:layout_constraintBottom_toBottomOf="parent"
            app:layout_constraintEnd_toEndOf="parent"
            app:layout_constraintStart_toStartOf="parent"
            app:layout_constraintTop_toTopOf="parent"
            tools:srcCompat="@tools:sample/backgrounds/scenic" …
dimitrilc 30 Junior Poster

This is the second part of a series. The first part can be found here.

Draw The Yin

Now that we have the Yang drawn, we will continue onto the Yin.

  1. Add the Paint for the Yin into the YingYang class. We will use a stroke style initially to draw. When are happy with the drawing, we can comment it out to make the code draw with the fill style (default).

     private val yinPaint = Paint().apply {
        color = Color.BLACK
        style = Paint.Style.STROKE
        strokeWidth = 10f
     }
  2. There are 3 arcs that we must draw in total for the teardrop-shaped Yin. The image below shows the arcs in order and different colors to make it easy to understand.
    Yin_arcs.png

  3. The green arrows show the flow of the contour.

  4. To draw the first arc, use the code below.

     private fun drawYin(canvas: Canvas){
        val yinPath = Path().apply {
            addArc(
                bounds.right * 0.25f, // 0.25 = full arc visible. 0.5 = arc invisible
                bounds.exactCenterY(),
                bounds.right * 0.75f, // 0.75 = full arc visible. 0.5 = arc invisible
                bounds.bottom.toFloat(),
                270f,
                -180f
            )
        }
    
        canvas.drawPath(yinPath, yinPaint)
     }

Screenshot_1666226949.png
5. There might be too much going on here from a single arc. Though I expected that you already know how to draw custom shapes, the picture below attempts to describe it.
Screenshot_1666226866.png
6. Whenever drawing an arc or a circle, it is best to visualize an invisible …

dimitrilc 30 Junior Poster
Animation Strategy

Welcome to part three of the tutorial; part two can be found here.

For this animation, I have chosen to redraw the YinYang Drawable at each frame. This means recreating the YinYang object with different constructor parameters on every frame (the current YinYang implementation has a zero-arg constructor).

Animating The First Yin Arc

Do you recall that our Yin teardrop contains three arcs in total? The first step to animate our Yin Yang is to isolate the parts that need to be animated. You can go ahead and comment out the code that draws the second and third Yin arcs, as well as the code that draws the Dots.

Your drawYin() method should look like the code below.

private fun drawYin(canvas: Canvas){
   val yinPath = Path().apply {
       addArc(
           bounds.right * 0.25f, // 0.25 = full arc visible. 0.5 = arc invisible
           bounds.exactCenterY(),
           bounds.right * 0.75f, // 0.75 = full arc visible. 0.5 = arc invisible
           bounds.bottom.toFloat(),
           270f,
           -180f
       )

/*            arcTo(
           0f,
           0f,
           bounds.right.toFloat(),
           bounds.bottom.toFloat(),
           90f,
           -180f,
           false
       )

       arcTo(
           bounds.right * 0.25f,
           0f,
           bounds.right * 0.75f,
           bounds.exactCenterY(),
           270f,
           180f,
           false
       )*/
   }

   canvas.drawPath(yinPath, yinPaint)
}

Your app now should look like the screenshot below, with the first Yin arc the only thing being drawn.

Screenshot_1666231309.png

To animate the first arc to invert on itself, we need to perform three main tasks:

  1. As the animation progresses, compress the arc over time until its width reaches zero. You can compress the arc by moving …
dimitrilc 30 Junior Poster
Introduction

Welcome to part two of the tutorial. Let us continue to learn how to animate views along a Path. Part one can be found here.

Important Coordinates

Both the sun and the moon in our app can occupy any one of the three important coordinates on the screen:

  • Active planet coordinate: this the is (x,y) coordinate of the sun or the moon when the animation is complete.
  • Hidden coordinate on the right bound: this is the coordinate of the sun or the moon that is setting (disappearing from view).
  • Hidden coordinate on the left bound: this is the coordinate of the sun or the moon that is rising (appearing into view),
  • quadTo() control coordinates: this is the coordinate that controls the curve of the Path drawn by the quadTo() method. I felt that it was important for the sun and the moon to rise/fall on a curve, which looks much more organic than flying straight in from the left or right side.

To be able to get these coordinates correctly, we can get them after the views have been drawn by the system. In MainActivity, add the instance properties below.

// Size is added to x,y coordinates to make the planet go off screen
private var planetSize = Pair(0, 0)

// Location of planet when it is shown on screen
private var activeXY = Pair(0f, 0f)

// Location of planet when hidden outside left or right bounds
private var hiddenLeftXY = Pair(0f, 0f)
private var …
dimitrilc 30 Junior Poster
Introduction

In the last tutorial, we learned how to draw complex shapes using a Path object. Using the concepts from the previous tutorial, we will now attempt to animate Views to move along a custom Path.

Goals

At the end of the tutorial, you would have learned:

  1. How to animate Views to move along a Path.
  2. How to choreograph animations using AnimatorSet.
Tools Required
  1. Android Studio. The version used in this tutorial is Android Studio Dolphin | 2021.3.1.
Prerequisite Knowledge
  1. Intermediate Android.
  2. Basic Animation.
  3. Drawing complex shapes using Path.
Project Setup

To follow along with the tutorial, perform the steps below:

  1. Create a new Android project with the default Empty Activity.

  2. Replace the content of activity_main.xml with the code below.

     <?xml version="1.0" encoding="utf-8"?>
     <androidx.constraintlayout.widget.ConstraintLayout xmlns:android="http://schemas.android.com/apk/res/android"
        xmlns:app="http://schemas.android.com/apk/res-auto"
        xmlns:tools="http://schemas.android.com/tools"
        android:id="@+id/container"
        android:layout_width="match_parent"
        android:layout_height="match_parent"
        tools:context=".MainActivity">
    
        <Button
            android:id="@+id/switch_day_night"
            android:layout_width="wrap_content"
            android:layout_height="wrap_content"
            android:text="Switch"
            app:layout_constraintBottom_toBottomOf="parent"
            app:layout_constraintEnd_toEndOf="parent"
            app:layout_constraintStart_toStartOf="parent" />
    
        <ImageView
            android:id="@+id/house"
            android:layout_width="200dp"
            android:layout_height="200dp"
            android:layout_marginBottom="32dp"
            android:background="@drawable/ic_baseline_house_24"
            app:layout_constraintBottom_toTopOf="@+id/switch_day_night"
            app:layout_constraintEnd_toEndOf="parent"
            app:layout_constraintStart_toStartOf="parent" />
    
            <ImageView
                android:id="@+id/cloud"
                android:layout_width="100dp"
                android:layout_height="100dp"
                android:layout_marginStart="48dp"
                android:layout_marginBottom="16dp"
                android:background="@drawable/ic_baseline_cloud_24"
                app:layout_constraintBottom_toTopOf="@+id/house"
                app:layout_constraintStart_toStartOf="parent" />
    
            <ImageView
                android:id="@+id/sun"
                android:layout_width="100dp"
                android:layout_height="100dp"
                android:layout_marginBottom="48dp"
                android:background="@drawable/ic_baseline_wb_sunny_24"
                app:layout_constraintBottom_toTopOf="@+id/house"
                app:layout_constraintEnd_toEndOf="parent"
                app:layout_constraintStart_toStartOf="parent" />
    
        <ImageView
            android:id="@+id/moon"
            android:layout_width="100dp"
            android:layout_height="100dp"
            android:background="@drawable/ic_baseline_mode_night_24"
            app:layout_constraintBottom_toTopOf="@+id/house"
            app:layout_constraintEnd_toStartOf="parent" />
    
     </androidx.constraintlayout.widget.ConstraintLayout>
  3. Add the vector drawable below as ic_baseline_cloud_24.xml.

     <vector android:height="24dp" android:tint="#002AFF"
        android:viewportHeight="24" android:viewportWidth="24"
        android:width="24dp" xmlns:android="http://schemas.android.com/apk/res/android">
        <path android:fillColor="@android:color/white" android:pathData="M19.35,10.04C18.67,6.59 15.64,4 12,4 9.11,4 6.6,5.64 5.35,8.04 2.34,8.36 0,10.91 0,14c0,3.31 2.69,6 6,6h13c2.76,0 5,-2.24 5,-5 0,-2.64 -2.05,-4.78 -4.65,-4.96z"/>
     </vector>
  4. Add the vector drawable below as ic_baseline_house_24.xml.

     <vector android:height="24dp" android:tint="#E08757"
        android:viewportHeight="24" android:viewportWidth="24"
        android:width="24dp" xmlns:android="http://schemas.android.com/apk/res/android">
        <path android:fillColor="@android:color/white" android:pathData="M19,9.3V4h-3v2.6L12,3L2,12h3v8h5v-6h4v6h5v-8h3L19,9.3zM10,10c0,-1.1 0.9,-2 2,-2s2,0.9 2,2H10z"/> …
dimitrilc 30 Junior Poster
Introduction

In the last tutorial, we learned how to draw basic shapes on Android using premade methods from the graphics library.

In this tutorial, we step up the difficulty a notch by learning how to draw using the Path class. The Path class allows for drawing of technically any shape imaginable, as a consequence, it is also a bit more complex to use compared to premade methods in the Canvas class.

Goals

At the end of the tutorial, you would have learned:

  1. How to draw complex shapes using Path.
Tools Required
  1. Android Studio. The version used in this tutorial is Android Studio Dolphin | 2021.3.1.
Prerequisite Knowledge
  1. Intermediate Android.
  2. How to draw basic shapes using the Canvas class.
Project Setup

To follow along with the tutorial, perform the steps below:

  1. Create a new Android project with the default Empty Activity.

  2. Replace the code in MainActivity.kt with the code below.

     class MainActivity : AppCompatActivity() {
        override fun onCreate(savedInstanceState: Bundle?) {
            super.onCreate(savedInstanceState)
            setContentView(R.layout.activity_main)
    
            findViewById<ImageView>(R.id.imageView_myImage)
                .setImageDrawable(ComplexShapes())
        }
     }
    
     class ComplexShapes : Drawable() {
        private val paint: Paint = Paint().apply {
            // Create your paint here
            style = Paint.Style.STROKE
            strokeWidth = 10f
            color = Color.RED
        }
    
        override fun draw(canvas: Canvas) {
    
        }
    
        override fun setAlpha(alpha: Int) {
            // Required but can be left empty
        }
    
        override fun setColorFilter(colorFilter: ColorFilter?) {
            // Required but can be left empty
        }
    
        @Deprecated("Deprecated by super class")
        override fun getOpacity() = PixelFormat.OPAQUE
     }
  3. Replace …

dimitrilc 30 Junior Poster
Introduction

Even though the built-in vector library included in Android Studio contains many icons readily for use, you might eventually run into a situation where a custom icon is needed. In this tutorial, we will learn how to create our own icons from basic shapes drawn on a Drawable’s Canvas.

Goals

At the end of the tutorial, you would have learned:

  1. How to draw basic shapes using custom Drawable.
Tools Required
  1. Android Studio. The version used in this tutorial is Android Studio Dolphin | 2021.3.1.
Prerequisite Knowledge
  1. Intermedia Android.
Project Setup

To follow along with the tutorial, perform the steps below:

  1. Create a new Android project with the default Empty Activity.

  2. Replace the code in activity_main.xml with the code below.

     <androidx.constraintlayout.widget.ConstraintLayout xmlns:android="http://schemas.android.com/apk/res/android"
        xmlns:app="http://schemas.android.com/apk/res-auto"
        xmlns:tools="http://schemas.android.com/tools"
        android:layout_width="match_parent"
        android:layout_height="match_parent"
        tools:context=".MainActivity">
    
        <ImageView
            android:id="@+id/imageView_myImage"
            android:layout_width="0dp"
            android:layout_height="0dp"
            app:layout_constraintBottom_toBottomOf="parent"
            app:layout_constraintEnd_toEndOf="parent"
            app:layout_constraintStart_toStartOf="parent"
            app:layout_constraintTop_toTopOf="parent"
            tools:srcCompat="@tools:sample/backgrounds/scenic" />
     </androidx.constraintlayout.widget.ConstraintLayout>

At this stage, our sample application only displays a blank screen.

  • (Optional) Go to Developer options and enable Pointer Location. This will allow you to see the screen coordinates when drawing.
Overriding Drawable

Before we can draw shapes, we will need to create a custom Drawable for our ImageView. Drawable’s children are required to override the method draw(), which is where the drawing can start.

Copy and paste the following custom Drawable, either in the file MainActivity.kt or as a different file.

class BasicShapes : Drawable() {
   private val paint: Paint = Paint().apply {
       // Create your …
dimitrilc 30 Junior Poster
Introduction

Android includes many options to add animations to your app. In this tutorial, we will learn how to add a type of animation called frame-by-frame animation into our Android app.

Goals

At the end of the tutorial, you would have learned:

  1. How to add frame-by-frame animation to an Android app.
Tools Required
  1. Android Studio. The version used in this tutorial is Android Studio Dolphin | 2021.3.1.
Prerequisite Knowledge
  1. Intermediate Android.
Project Setup

To follow along with the tutorial, perform the steps below:

  1. Create a new Android project with the default Empty Activity.

  2. Download the free Santa sprites from Game Art 2d.

  3. Unpack the archive and import all files in the png directory to the project (keep the same names that Android Studio generated for you).

  4. Copy and paste all the <string> resources below into your project’s strings.xml file.

     <string name="idle">Idle</string>
     <string name="walk">Walk</string>
     <string name="run">Run</string>
     <string name="jump">Jump</string>
     <string name="die">Die</string>
     <string name="slide">Slide</string>
  5. Replace all the content of activity_main.xml with the code below.

     <?xml version="1.0" encoding="utf-8"?>
     <androidx.constraintlayout.widget.ConstraintLayout xmlns:android="http://schemas.android.com/apk/res/android"
        xmlns:app="http://schemas.android.com/apk/res-auto"
        xmlns:tools="http://schemas.android.com/tools"
        android:layout_width="match_parent"
        android:layout_height="match_parent"
        tools:context=".MainActivity">
    
        <ImageView
            android:id="@+id/image_santa"
            android:layout_width="0dp"
            android:layout_height="300dp"
            app:layout_constraintEnd_toEndOf="parent"
            app:layout_constraintHorizontal_bias="0.5"
            app:layout_constraintStart_toStartOf="parent"
            app:layout_constraintTop_toTopOf="parent"
            android:src="@drawable/idle__1_" />
    
        <Button
            android:id="@+id/idle"
            android:layout_width="wrap_content"
            android:layout_height="wrap_content"
            android:layout_marginTop="16dp"
            android:text="@string/idle"
            app:layout_constraintBottom_toTopOf="@id/walk"
            app:layout_constraintEnd_toEndOf="parent"
            app:layout_constraintHorizontal_bias="0.5"
            app:layout_constraintStart_toStartOf="parent"
            app:layout_constraintTop_toBottomOf="@id/image_santa" />
    
        <Button
            android:id="@+id/walk"
            android:layout_width="wrap_content"
            android:layout_height="wrap_content"
            android:text="@string/walk"
            app:layout_constraintBottom_toTopOf="@id/run"
            app:layout_constraintEnd_toEndOf="parent"
            app:layout_constraintHorizontal_bias="0.5"
            app:layout_constraintStart_toStartOf="parent"
            app:layout_constraintTop_toBottomOf="@id/idle" />
    
        <Button
            android:id="@+id/run"
            android:layout_width="wrap_content"
            android:layout_height="wrap_content"
            android:text="@string/run"
            app:layout_constraintBottom_toTopOf="@id/jump"
            app:layout_constraintEnd_toEndOf="parent"
            app:layout_constraintHorizontal_bias="0.5"
            app:layout_constraintStart_toStartOf="parent"
            app:layout_constraintTop_toBottomOf="@id/walk" />
    
        <Button
            android:id="@+id/jump"
            android:layout_width="wrap_content"
            android:layout_height="wrap_content"
            android:text="@string/jump"
            app:layout_constraintBottom_toTopOf="@id/slide"
            app:layout_constraintEnd_toEndOf="parent"
            app:layout_constraintHorizontal_bias="0.5"
            app:layout_constraintStart_toStartOf="parent"
            app:layout_constraintTop_toBottomOf="@id/run" />
    
        <Button
            android:id="@+id/slide"
            android:layout_width="wrap_content"
            android:layout_height="wrap_content" …
dimitrilc 30 Junior Poster
Introduction

Every Android View has a layoutParams property. This property tells the parent ViewGroup how a View wants to be laid out; it is also often used to change the size of a View.

In this tutorial, we will learn how to animate Views while modifying their layoutParams.

Goals

At the end of the tutorial, you would have learned:

  1. How to animate Views when modifying layoutParams.
Tools Required
  1. Android Studio. The version used in this tutorial is Android Studio Dolphin | 2021.3.1.
Prerequisite Knowledge
  1. Intermediate Android.
Project Setup

To follow along with the tutorial, perform the steps below:

  1. Create a new Android project with the default Empty Activity.

  2. Add the ic_baseline_sports_basketball_24 vector asset to your project.

  3. Replace the content of activity_main.xml with the code below.

     <?xml version="1.0" encoding="utf-8"?>
     <androidx.constraintlayout.widget.ConstraintLayout xmlns:android="http://schemas.android.com/apk/res/android"
        xmlns:app="http://schemas.android.com/apk/res-auto"
        xmlns:tools="http://schemas.android.com/tools"
        android:layout_width="match_parent"
        android:layout_height="match_parent"
        tools:context=".MainActivity">
    
        <ImageView
            android:id="@+id/imageView"
            android:layout_width="wrap_content"
            android:layout_height="wrap_content"
            android:src="@drawable/ic_baseline_sports_basketball_24"
            app:layout_constraintBottom_toBottomOf="parent"
            app:layout_constraintEnd_toEndOf="parent"
            app:layout_constraintStart_toStartOf="parent"
            app:layout_constraintTop_toTopOf="parent" />
     </androidx.constraintlayout.widget.ConstraintLayout>
Animate Using ValueAnimator

The first method that we are going to learn in this tutorial would be to use the class ValueAnimator. ValueAnimator has many different static factory methods, but we will focus on the ofInt() method here.

ValueAnimator’s ofInt() or ofFloat() methods can be used to animate/iterate from a starting number to an ending number. When ValueAnimator is iterating over the numbers, we can set a listener when the number updates. You can access the current value using the property animatedValue.

To animate the basketball doubling in size …

dimitrilc 30 Junior Poster
Introduction

Cards are a common widget for Material 3-themed applications. Expanding a card after the user performs a click action is a very common behavior. While Android can automatically render the new expanded card automatically, we will have to implement our own animation if we want a smooth, animated transition.

Goals

At the end of the tutorial, you would have learned:

  1. How to animate card expansion animation.
Tools Required
  1. Android Studio. The version used in this tutorial is Android Studio Dolphin | 2021.3.1.
Prerequisite Knowledge
  1. Intermediate Android.
  2. Basic Material 3.
Project Setup

To follow along with the tutorial, perform the steps below:

  1. Create a new Android project with the default Empty Activity.

  2. Upgrade the Material library version to 1.8.0-alpha01.

     implementation 'com.google.android.material:material:1.8.0-alpha01'
  3. Add these two strings into strings.xml.

     <string name="expand">Expand</string>
     <string name="collapse">Collapse</string>
     <string name="super_large_text">SUPER LARGE TEXT</string>
  4. Open themes.xml and replace the current theme’s parent theme with Theme.Material3.DayNight.NoActionBar.

     <style name="Theme.DaniwebMaterial3CardExpandAnimation" parent="Theme.Material3.DayNight.NoActionBar">
  5. Replace the content of activity_main.xml with the code below.

     <?xml version="1.0" encoding="utf-8"?>
     <androidx.constraintlayout.widget.ConstraintLayout xmlns:android="http://schemas.android.com/apk/res/android"
        xmlns:app="http://schemas.android.com/apk/res-auto"
        xmlns:tools="http://schemas.android.com/tools"
        android:layout_width="match_parent"
        android:layout_height="match_parent"
        tools:context=".MainActivity">
    
        <com.google.android.material.card.MaterialCardView
            android:id="@+id/cardView"
            android:layout_width="0dp"
            android:layout_height="wrap_content"
            android:layout_marginHorizontal="16dp"
            app:layout_constraintBottom_toBottomOf="parent"
            app:layout_constraintEnd_toEndOf="parent"
            app:layout_constraintStart_toStartOf="parent"
            app:layout_constraintTop_toTopOf="parent">
    
            <androidx.constraintlayout.widget.ConstraintLayout
                android:layout_width="match_parent"
                android:layout_height="match_parent">
    
                <Button
                    android:id="@+id/button_sizeToggle"
                    android:layout_width="wrap_content"
                    android:layout_height="wrap_content"
                    android:text="@string/expand"
                    app:layout_constraintEnd_toEndOf="parent"
                    app:layout_constraintStart_toStartOf="parent"
                    app:layout_constraintTop_toTopOf="parent" />
    
                <TextView
                    android:id="@+id/textView_large"
                    android:layout_width="wrap_content"
                    android:layout_height="wrap_content"
                    android:text="@string/super_large_text"
                    android:textSize="64sp"
                    android:visibility="gone"
                    app:layout_constraintBottom_toBottomOf="parent"
                    app:layout_constraintEnd_toEndOf="parent"
                    app:layout_constraintStart_toStartOf="parent"
                    app:layout_constraintTop_toBottomOf="@id/button_sizeToggle"
                    tools:visibility="visible" />
    
            </androidx.constraintlayout.widget.ConstraintLayout>
        </com.google.android.material.card.MaterialCardView>
     </androidx.constraintlayout.widget.ConstraintLayout>
  6. Replace the content of MainActivity with the code below.

     class MainActivity : AppCompatActivity() {
        override fun onCreate(savedInstanceState: Bundle?) {
            super.onCreate(savedInstanceState)
            setContentView(R.layout.activity_main)
    
            val …
dimitrilc 30 Junior Poster
Introduction

When working on Espresso tests, you might have run into a situation where you need to verify what your app does when an activity is in a specific Lifecycle state. In this tutorial, we will learn how to achieve this by using the ActivityScenario class.

Goals

At the end of the tutorial, you would have learned:

  1. How to drive an Activity’s lifecycle.
Tools Required
  1. Android Studio. The version used in this tutorial is Android Studio Dolphin | 2021.3.1.
Prerequisite Knowledge
  1. Basic Android.
  2. Basic Espresso.
Project Setup

To follow along with the tutorial, perform the steps below:

  1. Create a new Android project with the default Empty Activity.

  2. Replace the entire content of the MainActivity.kt class with the code below. This is just a simple Activity that logs some text at onCreate(), onStart(), onResume(), and onDestroy() methods.

     private const val TAG = "MAIN_ACTIVITY"
    
     class MainActivity : AppCompatActivity() {
        override fun onCreate(savedInstanceState: Bundle?) {
            Log.d(TAG, "On Create")
            super.onCreate(savedInstanceState)
            setContentView(R.layout.activity_main)
        }
    
        override fun onStart() {
            Log.d(TAG, "On Start")
            super.onStart()
        }
    
        override fun onResume() {
            Log.d(TAG, "On Resume")
            super.onResume()
        }
    
        override fun onDestroy() {
            Log.d(TAG, "On Destroy")
            super.onDestroy()
        }
     }
  3. In Android Studio’s Logcat, we can use the query below to see the log messages after we run our tests.

     level:debug tag:MAIN_ACTIVITY
  4. In the androidTest source set, remove all test cases from the file named ExampleInstrumentedTest.java.

Use ActivityScenario to Drive Activity States

The two primary …

dimitrilc 30 Junior Poster
Introduction

In Android Studio, we can run multiple tests in parallel across multiple devices using the dropdown menu.

Screen_Shot_2022-09-26_at_3.02.02_PM.png

Running instrumented tests this way is very convenient during development, but there is a problem with this method when your tests are run on a remote build server:

  • There is no easy way to make sure that all of your emulators are in a consistent state between test runs.

To solve this problem, we can use a special type of emulator called Automated Test Device (ATD). ATDs are different from regular emulators in a couple of ways:

  1. Pre-installed apps that are not useful for your tests are removed. This reduces flakiness and potential device problems from update prompts.
  2. Background services that are not useful for your tests are disabled. This frees up resources for your ATD, improving test speeds.
  3. Hardware rendering is disabled. This allows your test to run on typical headless build servers that do not have a compatible GPU.

In this tutorial, we will learn how to set up our own ATDs using Gradle Managed Devices.

Goals

At the end of the tutorial, you would have learned:

  1. How to set up Automated Test Devices using Gradle Manged Devices.
Tools Required
  1. Android Studio. The version used in this tutorial is Android Studio Dolphin | 2021.3.1.
Prerequisite Knowledge
  1. Intermediate Android.
  2. Basic Instrumented Tests.
Project Setup

To follow along with the tutorial, perform the steps below:

  1. Create a …
dimitrilc 30 Junior Poster
Introduction

In the last tutorial, we learned how to send messages to a RabbitMQ queue. In this tutorial, we will learn how to consume those messages in Kotlin.

Goals

At the end of the tutorial, you would have learned:

  1. How to use the RabbitMQ Java Client library to consume messages In Kotlin.
Tools Required
  1. A Kotlin IDE such as IntelliJ IDEA version 2022.2.1 (Community Edition).
Prerequisite Knowledge
  1. How to publish messages to RabbitMQ exchanges.
  2. Basic Kotlin
Project Setup

To follow along with the tutorial, perform the steps below:

  1. In IntelliJ, create a new Kotlin project using Gradle as the build system.
    Screen_Shot_2022-09-09_at_11.36.41_AM.png

  2. Add the required dependencies into the build.gradle.kts file. This is the RabbitMQ Java Client and its slf4j dependencies.

     // https://mvnrepository.com/artifact/com.rabbitmq/amqp-client
     implementation("com.rabbitmq:amqp-client:5.15.0")
    
     implementation("org.slf4j:slf4j-simple:2.0.0")
     implementation("org.slf4j:slf4j-api:2.0.0")
Creating A Consumer User

Similarly to how we created a dedicated user for publishing messages in the previous tutorial, let us create a new user for the purpose of consuming messages only.

  1. Log into the management interface.

  2. Go to the Admin tab.

  3. Select Add a user.

  4. Provide consumer as the username and password as the password.

  5. Hit Add user.
    Screen_Shot_2022-09-09_at_12.48.24_PM.png

  6. After the user is created, click on the username consumer.

  7. Give the consumer user read-only access to the virtual host /.

  8. Hit Set Permission.

Screen_Shot_2022-09-09_at_12.51.33_PM.png

The consumer

dimitrilc 30 Junior Poster
Introduction

In the last tutorial, we learned how to set up our own RabbitMQ exchanges and queues. In this tutorial, we will learn how to send messages to our custom daniweb-exchange.

Goals

At the end of the tutorial, you would have learned:

  1. How to send messages in RabbitMQ.
Tools Required
  1. A RabbitMQ server with the same custom exchange and queue from this tutorial.
Prerequisite Knowledge
  1. RabbitMQ Exchanges and Queues.
  2. Basic Java (only second part).
Project Setup

To follow along with the tutorial, perform the steps below:

  1. Log into RabbitMQ’s management interface.
Send Message Using The Management Interface

The most convenient method to send a message is via the management interface itself. Keep in mind that this is only possible to users who have permission to access the management interface.

To send a message to the daniweb-exchange, follow the steps below.

  1. Go to Exchanges, and then select daniweb-exchange.
    Screen_Shot_2022-09-08_at_5.47.55_PM.png

  2. Scroll down until you see Publish Message. Fill in the information exactly like the screenshot below. The Routing key and the Properties must be valid. Payload and Headers can be set with your value of choice.
    Screen_Shot_2022-09-08_at_5.50.53_PM.png

  3. Hit Publish message.

Because we used the routing key daniweb-to-my-queue, the message is automatically sent to my-queue. If we switched back to the my-queue view, then we can see the message that we just sent in the ready status.

Screen_Shot_2022-09-08_at_6.03.04_PM.png

This …

dimitrilc 30 Junior Poster
Introduction

In the previous tutorial, we learned how to set up our own RabbitMQ server. In this tutorial, we will learn how to create our own exchange and queue.

Goals

At the end of the tutorial, you would have learned:

  1. How to create your own exchanges and queues.
Tools Required
  1. A RabbitMQ server.
Prerequisite Knowledge
  1. Basic Docker.
Project Setup

To follow along with the tutorial, perform the steps below:

  1. Log into RabbitMQ’s management interface.
Direct Exchange Routing

Although an AMQP server is capable of many different methods of routing messages, we will only learn about direct exchanges in this tutorial. The diagram below illustrates the direct exchange model.

amqp_direct_exchange.jpg

If you are new to AMQP, the diagram above might look confusing, so here is my best attempt to break it down to you.

  1. Outside the RabbitMQ Server, there is the Publisher. The publisher sends messages to exchanges. It is up to the exchanges to decide which queue to route the messages to.
  2. The Exchange routes the messages to queues that you have configured it to. We will discuss how this configuration works later in the tutorial.
  3. Queues are objects that store messages and send them out to consumers. RabbitMQ queues are FIFO (first in, first out). After the messages are sent to the queues, the messages stay there until they are consumed. By default, the messages are automatically removed after the client consumes them AND sends back an …
dimitrilc 30 Junior Poster
Introduction

AMQP (Advanced Message Queuing Protocol) is a popular protocol used for communication between messaging middleware and clients. At the time of this writing, the latest version of the AMQP is 1.0, but we will focus on version 0-9-1 instead. 0-9-1 is the default version shipped with the popular AMQP Broker (server) implementation RabbitMQ.

In this tutorial, we will learn how to install and set up our own RabbitMQ server using Docker.

Goals

At the end of the tutorial, you would have learned:

  1. How to install RabbitMQ server with Docker.
Tools Required
  1. A computer that is known to work well with Docker Desktop, which should support hardware virtualization.
  2. If you are familiar with Docker Engine itself, and you are on Linux without hardware virtualization, then you can still attempt to follow this tutorial via CLI.
Prerequisite Knowledge
  1. Docker Desktop Basics.
  2. Basic Linux Administration.
Project Setup

To follow along with the tutorial, perform the steps below:

  1. If you do not already have it, install Docker Desktop on your computer.
    Start Docker Desktop and navigate to the Dashboard.

Screen_Shot_2022-09-06_at_3.47.32_PM.png

Install The Official RabbitMQ Image

First, we will install RabbitMQ using the official Docker image from Docker Hub. Before installing the image, let us inspect that command that we will use,

docker run -d -h container-hostname --name daniweb-rabbit -e RABBITMQ_DEFAULT_USER=user -e RABBITMQ_DEFAULT_PASS=password -p 80:15672 -p 5672:5672 rabbitmq:3-management

You can find the breakdown of the command above in the following list:

dimitrilc 30 Junior Poster

I came across this article from IBM. It states that a protocol describes the format of the bytes that are transferred over the wire.

A protocol is sometimes referred to as the wire protocol, and it describes the format of the bytes that are transferred over the wire, and the combination of messages, or packets, that are exchanged for a particular operation.

Just out of curiosity, I found what seem to be describing this format for some of the protocols that I am interested in.

  1. For HTTP, I found RFC 7230, section 3. https://www.rfc-editor.org/rfc/rfc7230.html#page-19
  2. For MQTT, I found https://docs.oasis-open.org/mqtt/mqtt/v5.0/os/mqtt-v5.0-os.html#_Toc3901019, section 2.
  3. For AMQP 0-9-1, I found the spec at https://www.amqp.org/specification/0-9-1/amqp-org-download, section 4.2.1. It says that the file is under the AMQP license, and I am not familiar with that license, so I will not share it here. There is nothing to stop you from downloading it yourself, it seems.

So my question is:

Am I looking at the correct information if I am trying to find out about the format of the bytes for these 3 protocols?

dimitrilc 30 Junior Poster
Introduction

When working with Selenium, you might have run into a situation where you have to wait for long-running tasks to complete before you can interact with elements. Fortunately, Selenium has support for such situations via its many waits API.

In this tutorial, we will learn how to wait for the web page with Selenium.

Goals

At the end of the tutorial, you would have learned:

  1. How to wait for long-running tasks with Selenium.
Tools Required
  1. A Java IDE such as IntelliJ IDEA version 2022.2 (Community Edition).
Prerequisite Knowledge
  1. Basic Java.
  2. Basic Selenium.
  3. Basic Spring.
Project Setup

To follow along with the tutorial, perform the steps below:

  1. Clone this repository, switching to the waits branch.
Explicit Wait

First, let us get started with learning about Explicit Waits. The word explicit here refers to the element that you are waiting on, and not about the waiting time. Whether you are using explicit wait or implicit wait, you must specify a timer.

In our project, the end point “/waits” would take up to 5 seconds to load the words “Hello World!”. What do you think will happen to the test below when run?

@Test
void explicitWait(){
 driver.get("http://localhost:" + port + "/waits");

 new WebDriverWait(driver, Duration.ofSeconds(4))
       .until(_d -> driver.findElement(By.cssSelector("p")));
}

Well, because we have only waited for four seconds, it obviously would fail with a TimeOutException because the timer has elapsed before the <p> is added to the page.

org.openqa.selenium.TimeoutException: Expected condition …
dimitrilc 30 Junior Poster
Introduction

Welcome to part 2 of the Selenium scrolling tutorial. Please follow the directions in part 1 to set up your project.

In part 1, we learned how to let Selenium decide how it wants to scroll to elements. In this part 2, we will learn about a couple more scrolling use cases, which includes scrolling by the amount of pixels.

Scrolling Along The Y Axis

In Selenium scripts, a common use case is scrolling by an amount of pixels vertically. To do this, you can use the method scrollByAmount() by the Actions API. For example, if you want to scroll down by 10 pixels and then 500 pixels, then you can use the code below.

@Test
void scrollByDown() throws InterruptedException {
  driver.get("http://localhost:" + port + "/start");

  new Actions(driver)
        .scrollByAmount(0, 10)
        .perform();

  new Actions(driver)
        .scrollByAmount(0, 500)
        .perform();

  Thread.sleep(5000);
}

The example shows how to scroll down, but if you want to scroll up, simply use a negative y delta instead. The test below initially scrolls all the way to the end, and then all the way back up.

@Test
void scrollByUp() throws InterruptedException {
  driver.get("http://localhost:" + port + "/start");

  // Scrolls to end of page
  new Actions(driver)
        .sendKeys(Keys.END)
        .perform();

  Thread.sleep(2000);

  new Actions(driver)
        .scrollByAmount(0, -1000)
        .perform();

  Thread.sleep(5000);
}
Scrolling Along The X Axis

Similarly, if you want to scroll horizontally, you can simply do that by changing the x delta to another value besides 0. The example below shows how scrolling along the X axis looks like.

@Test
void scrollByXDown() …
dimitrilc 30 Junior Poster
Introduction

In the last Selenium tutorial, we learned how to perform basic actions such as clicking and sending keystrokes. In this tutorial, we will learn how to do another action, which is the scrolling action.

Goals

At the end of the tutorial, you would have learned:

  1. How to perform scroll actions in Selenium
Tools Required
  1. A Java IDE such as IntelliJ IDEA version 2022.2.1 (Community Edition).
Prerequisite Knowledge
  1. Basic Selenium.
  2. Selenium IDE.
  3. Basic Spring.
  4. Selenium Interactions.
Project Setup

To follow along with the tutorial, perform the steps below:

  1. Clone this repository, switching to the scrolling branch.
Selenium Cannot Interact With Elements Outside The Viewport

Because Selenium follows the WebDriver specs, it cannot interact with elements that are outside the viewport. The WebDriver specification states,

If the element is outside the viewport, an element not interactable error is returned.

If you want to interact with elements outside the viewport, then you should instruct Selenium to scroll the page until those elements are visible. We will learn how to do this next.

Let Selenium Decides How To Scroll To Elements

Even though Selenium cannot interact with elements outside the viewport, it can obviously still see all the element in the DOM tree. If an element is not interactable, and Selenium can see it in the DOM, then Selenium will attempt to scroll until the element is in the viewport. The beauty of this is …

dimitrilc 30 Junior Poster
Introduction

When creating a Selenium test, it is common for developers to want their scripts to take the same actions as a real human user would take. These action often includes clicking on elements or inputting text data into forms.

In this tutorial, we will learn how to perform both clicks and sending text on a web page.

Goals

At the end of the tutorial, you would have learned:

  1. How to perform click and sending text actions using Selenium.
Tools Required

A Java IDE such as IntelliJ IDEA version 2022.2.1 (Community Edition).

Prerequisite Knowledge
  1. Basic Selenium.
  2. Selenium IDE.
  3. Basic Spring.

I expect that you already know how to set up your project with Selenium and how to spy elements, so how I will not show how to do that in this tutorial.

Project Setup

To follow along with the tutorial, perform the steps below:

  1. Clone this repository, switching to the element_interactions branch.
Clicking On Elements

Clicking on an element is the easiest and probably most common that your scripts need to take. Calls to findElement() from the WebDriver will often result in a WebElement (unless any Exceptions are thrown). The WebElement interface has the click() that you can call to perform the click action on the respective element.

The click() test in the SeleniumApplicationTests file demonstrates how to perform the click action.

@Test
void click(){
  driver.get("http://localhost:" + port);

  driver.findElement(By.cssSelector(".btn-outline-primary"))
        .click();
}
Verifying After Click

Oftentimes, we would like to verify …

dimitrilc 30 Junior Poster
Introduction

While creating Selenium tests, you might have found that inspecting elements manually using the web browser’s inspector could be tedious. Even after you have found the element, you still have to go through the pain of looking up the correct xpath syntax for this specific element.

To solve this problem, you can employ the use of a tool called the Selenium IDE. This program can run inside your Chrome, FireFox, and Edge browsers as a plugin.

Goals

At the end of the tutorial, you would have learned:

  1. How to use Selenium IDE to generate test code.
Tools Required
  1. One of the following web browsers: Chrome, FireFox, Edge.
  2. A Java IDE such as IntelliJ IDEA version 2022.2 (Community Edition).
Prerequisite Knowledge
  1. Basic Selenium.
  2. Basic Spring.
Project Setup

To follow along with the tutorial, perform the steps below:

  1. If you have FireFox, download the IDE as a plugin from the official extensions page.
  2. If you have Chrome or Edge, install the IDE from the official web store.
  3. This tutorial is a continuation of the basic Selenium tutorial, so go ahead and clone this repository, switching to the setup_maven_it branch.
  4. After you are finished cloning the repo, start the server by running the SeleniumApplication class. You should see the Pricing Example home page at this point.
Start The Selenium IDE

After you have installed the Selenium IDE, it should show up on your browser’s plugins section, usually at …

dimitrilc 30 Junior Poster
Introduction

Selenium is one of the most popular web browser automation tools out there. There is no restriction on what you can use Selenium for. You can use it to build a GPU scalping bot (please don’t) or build e2e tests for your website.

In this tutorial, we will be learning how to set up a Maven Spring project to automatically start and stop the server when selenium tests are run.

Goals

At the end of the tutorial, you would have learned:

  1. How to set up your Maven Spring project for automated browser tests.
Tools Required
  1. A Java IDE such as IntelliJ IDEA version 2022.2 (Community Edition).
Prerequisite Knowledge
  1. Basic Java.
  2. Basic Spring.
Project Setup

To follow along with the tutorial, perform the steps below:

  1. Clone the project on from this repository.
  2. Make sure that you switch to the setup_maven_it branch.
Project Overview

This is a very minimal Spring Boot project. It only contains three dependencies:

  1. Spring Boot Starter Web.

         <dependency>
           <groupId>org.springframework.boot</groupId>
           <artifactId>spring-boot-starter-web</artifactId>
         </dependency>
  2. Thymeleaf.

     <dependency>
       <groupId>org.springframework.boot</groupId>
       <artifactId>spring-boot-starter-thymeleaf</artifactId>
     </dependency>
  3. Spring Boot Starter Test.

     <dependency>
       <groupId>org.springframework.boot</groupId>
       <artifactId>spring-boot-starter-test</artifactId>
       <scope>test</scope>
     </dependency>

The homepage was downloaded from Bootstrap.

Screen_Shot_2022-08-14_at_4.30.23_PM.png

We will not be doing too much testing in this tutorial, because this tutorial is mainly about setting up the project.

Selenium Library

The first thing that we will need to do in our project is to add the Selenium dependency into …

dimitrilc 30 Junior Poster
Introduction

While Functional Interfaces and Function Types are used to declare the types of a function, Function Literals create the actual implementations of these types.

In this tutorial, we will learn what Kotlin Function Literals are and how to create them.

Goals

At the end of the tutorial, you would have learned:

  1. How to create lambdas.
  2. How to create anonymous functions.
Tools Required
  1. A Kotlin IDE such as IntelliJ IDEA version 2022.2 (Community Edition).
  2. The Kotlin version used in this tutorial is 1.7.10.
Prerequisite Knowledge
  1. Basic Kotlin
  2. Function Types
Project Setup

To follow along with the tutorial, perform the steps below:

  1. Create a new Kotlin project using Gradle as the build system.
  2. For the Project JDK, use JDK 18.
Lambda Expressions

The syntax for a lambda expression includes the following rules:

  1. Must always be surrounded by curly braces.
  2. Parameters go inside the curly braces, to the left of the arrow (->). Type annotation is optional if no explicit function type is declared on the variable, parameter, and return type.
  3. The body goes inside the curly braces, after the arrow (->).
  4. Unless the return type of the lambda is Unit, the lambda implicitly returns the last expression or the single value.

Here is an example of a lambda expression:

val timesTwo: (Int) -> Int = { x: Int -> x * 2 }

Screen_Shot_2022-08-14_at_10.42.21_AM.png

Because the type declaration already specified the parameter type, we can skip that …

dimitrilc 30 Junior Poster
Introduction

Whenever I want to express method parameters, return type or variables as a method in Java, I often find myself having to do a bit of work:

  1. If I cannot remember which pre-made functional interface to use, then I will have to look up the list of pre-made functional interfaces from the Java SE documentation.
  2. But the problem does not stop there. If none of the functional interfaces on the list fit my use case, then I would have to resort to making my own functional interface. This is tedious and pollute my project with functional interfaces, especially if they are only used once.

Kotlin (and a few other languages) have a feature called Function Type, which allows you to declare function parameters, function return value, and variables as having a function as their types. With function types, we can skip creating our own functional interfaces, reducing boilerplate.

In this tutorial, we will learn how to use Function Types in our code.

Goals

At the end of the tutorial, you would have learned:

  1. How to create and use Function Types.
Tools Required
  1. A Kotlin IDE such as IntelliJ IDEA version 2022.2 (Community Edition).
  2. The Kotlin version used in this tutorial is 1.7.10.
Prerequisite Knowledge
  1. Basic Kotlin.
  2. Java Functional Interfaces (optional).
Project Setup

To follow along with the tutorial, perform the steps below:

  1. Create a new Kotlin project using Gradle as the build system.
  2. For the Project JDK, use JDK …
dimitrilc 30 Junior Poster

You are correct, I had to study DriverManager for the 1z0-819 a while back. Looking back at my notes more carefully, I do see the book says, "you should use DataSource in real code" lol.

dimitrilc 30 Junior Poster
Introduction

The Hyper Text Transfer Protocol (HTTP) is one of the most common communication protocol on the internet.

There are three major versions of HTTP that you should be aware of: 1.1, 2.0, 3.0.

Versions 1.1 and 2.0 are widely used today, so this tutorial mainly focuses on these two well-known standards.

Version 3.0 is still fairly new, so you will probably will not see it adopted widely yet; you should at least be aware of it because you might run into it in the near future. Version 3.0 is in the Proposed Standard state, which means that it is stable, but lacks maturity.

This article aims to teach you the basics of HTTP debugging, giving you enough of a starting point, so that you know where to start looking whenever you run into a problem.

The HTTP Connection

For the majority of the time, the tools that we use every day, such as web browsers or mobile apps, abstract away most of the inner workings of HTTP connections. For this lesson, we will use the command line tool curl to dig a little deeper into how these connections work.

When using curl with the flags -vL pointing to https://google.com,

curl -vL https://google.com

The output is:

*   Trying 142.251.15.100:443...
* Connected to google.com (142.251.15.100) port 443 (#0)
…
*  SSL certificate verify ok.
* Using HTTP2, server supports multiplexing
…
> GET / HTTP/2
> Host: google.com
> user-agent: curl/7.79.1
> accept: */*
>
< HTTP/2 301
< location: https://www.google.com/ …
dimitrilc 30 Junior Poster
Introduction

When working on Java applications, it is very likely that you will run into JDBC at some point. While you are unlikely to have to work directly with JDBC when using frameworks, it is still important to know how the connection is established and how queries are sent, so can detect performance issues in your application.

Databases come in all sizes and features, so the JDBC API was created to act as the only universal interface that your code needs to be aware of.

Goals

At the end of the tutorial, you would have learned how to:

  1. Set up an H2 database in memory mode.
  2. Prepopulate an H2 database with a SQL script and a CSV file.
  3. Connect to a database in your Java program using JDBC.
  4. Perform simple queries using PreparedStatement.
  5. Read the results from a ResultSet.
Tools Required
  1. A Java IDE such as IntelliJ IDEA version 2022.2 (Community Edition).
Prerequisite Knowledge
  1. Basic Java.
Project Setup

To follow along with the tutorial, perform the steps below:

  1. Import the Daniweb Maven JDBC repository into your IDE.
JDBC Driver

The first topic about JDBC that you need to know is the java.sql.Driver interface. Driver is how your Java application connect to the database, but it is only an interface with no concrete implementation. For each database that you want to connect to, you would need to download the drivers for them. The JAR files that you downloaded or loaded via build …

dimitrilc 30 Junior Poster
Introduction

When following tutorials on Daniweb, you might have run into one that requires knowledge about Dependency Injection as a prerequisite. People might also sometimes use the term Inversion of Control interchangeably with DI.

These terms are related to one another, but they are not the same. In this article, we will learn the basics of Dependency Injection and I will attempt to explain it in the simplest way possible.

Goals

At the end of the article, you would have learned:

  1. What dependency injection is.
Prerequisite Knowledge
  1. Basic Java.
Dependency Injection vs. Inversion of Control

IoC refers to a programming principle where a framework calls your code instead of your code interacting with a particular device by itself. Because the framework is directly interacting with the device, but not your code, the control has been inverted from you to the framework.

An example of this is the Android Activity class, where you are mostly responsible for defining what to do at lifecycle callbacks, such as onStart(), or onPause(). The Android system is responsible for calling your code when your App is started or paused.

The opposite of IoC is when you open a database connection yourself, execute whatever queries that you need, and then closing the connection. You are in control here and no framework is calling your code.

DI is a little different to IoC because with DI, you are only giving up the control of the creation of dependencies. You simply state what …

dimitrilc 30 Junior Poster
Introduction

Java annotations are often used to provide extra information for compilers, IDEs, and build tools. The extra information is often used to enhance the development cycle, such as reducing boilerplate, eliminating repetitive code, or warning against unsafe usage or mistakes.

This tutorial aims to teach you the basic amount of knowledge about annotations, so that you can identify them and know what to search for in your coding journey.

Goals

At the end of the tutorial, you would have learned:

  1. What Java annotations are.
  2. When to use Java annotations.
Tools Used
  1. A Java IDE. IntelliJ CE version #IC-221.6008.13 was used for this tutorial.
  2. Java 18 was used.
Prerequisite Knowledge
  1. Basic Java.
Annotation Interface vs Annotation

Before anything else, let us get a common source of confusion regarding terminology out of the way. What is commonly called Annotation by Java developers can refer to two different things:

  1. Annotation Interface: blueprints for creating instances of Annotations. For example:

     public @interface Override {
     }
  2. Annotation: instances of Annotation Interfaces that can used to mark elements in your code. For example, two instances of the Annotation Interface @Override are used below.

     @Override
     public String toString() {
        return super.toString();
     }
    
     @Override
     public boolean equals(Object obj) {
        return super.equals(obj);
     }
Annotation Interface

Most of the rules for interfaces also apply to annotation interfaces. However, a few key differences are:

  1. The keyword interface must be preceded by an @ character.

dimitrilc 30 Junior Poster
Introduction

In Android projects, DataSource classes act as entry points to interacting with local or remote data sources. Their dependencies tend to be HTTP clients, the database, or DAOs, and their dependents are usually Repository classes.

In this tutorial, we will learn how to provide a fake DataSource to a Repository in unit tests.

Note that DataSource classes mentioned in this tutorial refers to classes following the naming convention of type of data + type of source + DataSource and not some specific framework class.

Goals

At the end of the tutorial, you would have learned:

  1. How to create fake DataSource classes.
Tools Required
  1. Android Studio. The version used in this tutorial is Android Studio Chipmunk 2021.2.1 Patch 1.
Prerequisite Knowledge
  1. Basic Android.
  2. Basic Unit Testing.
Project Setup

To follow along with the tutorial, perform the steps below:

  1. Create a new Android project with the default Empty Activity.

  2. Create a class called UserLocalDataSource using the code below. This is just a simple class that with a few functions to keep it simple. It also contains two dependencies: a database and a web service.

     class UserLocalDataSource(
        private val dataBase: Any,
        private val httpClient: Any
     ) {
        fun getUserName() = "User Name"
        fun getUserBirthday() = "User Birthday"
        fun getUserAddress() = "User Address"
     }
  3. Create a class called UserRepository using the code below. This class depends on all functions of UserLocalDatasource.

     class UserRepository(private val userLocalDataSource: UserLocalDataSource) {
        fun …
Vu_812 commented: thanks +0
dimitrilc 30 Junior Poster
Introduction

In this tutorial, we will learn how to create an instrumented test for Navigation Components.

Goals

At the end of the tutorial, you would have learned:

  1. How to test Navigation Components.
Tools Required
  1. Android Studio. The version used in this tutorial is Android Studio Chipmunk 2021.2.1 Patch 1.
Prerequisite Knowledge
  1. Intermediate Android.
  2. Basic Navigation Components.
  3. Basic Espresso.
Project Setup

To follow along with the tutorial, perform the steps below:

  1. Create a new Android project with the default Empty Activity.

  2. Add the dependencies below into your module build.gradle file.

     def nav_version = "2.4.2"
     // Kotlin
     implementation "androidx.navigation:navigation-fragment-ktx:$nav_version"
     implementation "androidx.navigation:navigation-ui-ktx:$nav_version"
     // Testing Navigation
     androidTestImplementation "androidx.navigation:navigation-testing:$nav_version"
     def fragment_version = "1.4.1"
     debugImplementation "androidx.fragment:fragment-testing:$fragment_version"
  3. Replace the code in activity_main.xml with the code below. This adds a FragmentViewContainer.

     <?xml version="1.0" encoding="utf-8"?>
     <androidx.constraintlayout.widget.ConstraintLayout xmlns:android="http://schemas.android.com/apk/res/android"
        xmlns:app="http://schemas.android.com/apk/res-auto"
        xmlns:tools="http://schemas.android.com/tools"
        android:layout_width="match_parent"
        android:layout_height="match_parent"
        tools:context=".MainActivity">
    
        <androidx.fragment.app.FragmentContainerView
            android:id="@+id/nav_host_fragment"
            android:name="androidx.navigation.fragment.NavHostFragment"
            android:layout_width="0dp"
            android:layout_height="0dp"
            app:layout_constraintLeft_toLeftOf="parent"
            app:layout_constraintRight_toRightOf="parent"
            app:layout_constraintTop_toTopOf="parent"
            app:layout_constraintBottom_toBottomOf="parent"
    
            app:defaultNavHost="true"
            app:navGraph="@navigation/nav_graph" />
    
     </androidx.constraintlayout.widget.ConstraintLayout>
  4. Add the navigation graph below into res/navigation. This navigation graph contains two destinations and one action.

     <?xml version="1.0" encoding="utf-8"?>
     <navigation xmlns:android="http://schemas.android.com/apk/res/android"
        xmlns:app="http://schemas.android.com/apk/res-auto"
        xmlns:tools="http://schemas.android.com/tools"
        android:id="@+id/nav_graph"
        app:startDestination="@id/homeFragment">
    
        <fragment
            android:id="@+id/homeFragment"
            android:name="com.example.daniwebandroidnavigationtest.HomeFragment"
            android:label="fragment_home"
            tools:layout="@layout/fragment_home" >
            <action
                android:id="@+id/action_homeFragment_to_destination1Fragment"
                app:destination="@id/destination1Fragment" />
        </fragment>
        <fragment
            android:id="@+id/destination1Fragment"
            android:name="com.example.daniwebandroidnavigationtest.Destination1Fragment"
            android:label="fragment_destination1"
            tools:layout="@layout/fragment_destination1" />
     </navigation>
  5. Create a Fragment called HomeFragment using the code below.

     class HomeFragment : Fragment() {
    
        override fun onCreateView(
            inflater: LayoutInflater, container: ViewGroup?,
            savedInstanceState: Bundle?
        ): View? {
            val layout = inflater.inflate(R.layout.fragment_home, container, false)
    
            val button = layout.findViewById<Button>(R.id.button)
            button.setOnClickListener {
                findNavController().navigate(R.id.action_homeFragment_to_destination1Fragment)
            }
    
            // …
dimitrilc 30 Junior Poster
Introduction ##

In this tutorial, we will learn how to load data asynchronously into a ListAdapter (a subclass of RecyclerView.Adapter).

Goals

At the end of the tutorial, you would have learned:

  1. How to serve asynchronous data to a ListAdapter.
Tools Required
  1. Android Studio. The version used in this tutorial is Android Studio Chipmunk 2021.2.1 Patch 1.
Prerequisite Knowledge
  1. Intermediate Android.
  2. *RecyclerView.Adapter.
  3. Kotlin coroutines.
  4. Retrofit.
  5. Moshi
Project Setup

To follow along with the tutorial, perform the steps below:

  1. Create a new Android project with the default Empty Activity.

  2. Add the dependencies below into your module build.gradle file.

     implementation "androidx.lifecycle:lifecycle-runtime-ktx:2.5.0-rc01"
     implementation 'com.squareup.retrofit2:retrofit:2.9.0'
     implementation 'androidx.activity:activity-ktx:1.4.0'
     implementation 'io.coil-kt:coil:2.1.0'
     implementation 'com.squareup.retrofit2:converter-moshi:2.9.0'
  3. Because we are reaching out to the Dog API (https://dog.ceo/dog-api) in this tutorial, internet permission will be required. Add the permission below to your manifest.

     <uses-permission android:name="android.permission.INTERNET"/>
  4. Replace the code in activity_main.xml with the code below. We have replaced the default TextView with a RecyclerView.

     <?xml version="1.0" encoding="utf-8"?>
     <androidx.constraintlayout.widget.ConstraintLayout xmlns:android="http://schemas.android.com/apk/res/android"
        xmlns:app="http://schemas.android.com/apk/res-auto"
        xmlns:tools="http://schemas.android.com/tools"
        android:layout_width="match_parent"
        android:layout_height="match_parent"
        tools:context=".MainActivity">
    
        <androidx.recyclerview.widget.RecyclerView
            android:id="@+id/recyclerView_dog"
            android:layout_width="match_parent"
            android:layout_height="match_parent"
            app:layoutManager="androidx.recyclerview.widget.GridLayoutManager"
            app:spanCount="2" />
    
     </androidx.constraintlayout.widget.ConstraintLayout>
  5. Create a new layout for a ViewHolder called item_view.xml. Replace the code inside item_view.xml with the code below.

     <?xml version="1.0" encoding="utf-8"?>
     <androidx.constraintlayout.widget.ConstraintLayout xmlns:android="http://schemas.android.com/apk/res/android"
        xmlns:app="http://schemas.android.com/apk/res-auto"
        xmlns:tools="http://schemas.android.com/tools"
        android:layout_width="wrap_content"
        android:layout_height="wrap_content">
    
        <ImageView
            android:id="@+id/imageView_breedImage"
            android:layout_width="50dp"
            android:layout_height="50dp"
            android:layout_margin="8dp"
            app:layout_constraintBottom_toBottomOf="parent"
            app:layout_constraintStart_toStartOf="parent"
            app:layout_constraintTop_toTopOf="parent"
            tools:srcCompat="@tools:sample/avatars" />
    
        <TextView
            android:id="@+id/textView_dogBreed"
            android:layout_width="wrap_content"
            android:layout_height="wrap_content"
            android:layout_marginHorizontal="8dp"
            tools:text="Dog Breed"
            android:textSize="18sp"
            app:layout_constraintBottom_toBottomOf="parent"
            app:layout_constraintStart_toEndOf="@+id/imageView_breedImage"
            app:layout_constraintTop_toTopOf="parent" />
    
     </androidx.constraintlayout.widget.ConstraintLayout>
  6. Create a new Kotlin file called DogService.kt. This …

dimitrilc 30 Junior Poster
Introduction ##

In this tutorial, we will learn how to filter and validate Intents fired from the application under test.

Goals

At the end of the tutorial, you would have learned:

  1. How to filter and validate Intents in Espresso tests.
Tools Required
  1. Android Studio. The version used in this tutorial is Android Studio Chipmunk 2021.2.1 Patch 1.
Prerequisite Knowledge
  1. Intermediate Android.
  2. Basic Espresso.
Project Setup

To follow along with the tutorial, perform the steps below:

  1. Create a new Android project with the default Empty Activity.

  2. Add the <string> resource below into strings.xml.

     <string name="launch_intent">Launch Intent</string>
  3. Replace the code inside activity_main.xml with the code below. This simply adds a Button.

     <?xml version="1.0" encoding="utf-8"?>
     <androidx.constraintlayout.widget.ConstraintLayout xmlns:android="http://schemas.android.com/apk/res/android"
        xmlns:app="http://schemas.android.com/apk/res-auto"
        xmlns:tools="http://schemas.android.com/tools"
        android:layout_width="match_parent"
        android:layout_height="match_parent"
        tools:context=".MainActivity">
    
        <Button
            android:id="@+id/button_launchIntent"
            android:layout_width="wrap_content"
            android:layout_height="wrap_content"
            android:text="@string/launch_intent"
            app:layout_constraintBottom_toBottomOf="parent"
            app:layout_constraintEnd_toEndOf="parent"
            app:layout_constraintStart_toStartOf="parent"
            app:layout_constraintTop_toTopOf="parent" />
     </androidx.constraintlayout.widget.ConstraintLayout>
  4. Add the dependencies below into your module build.gradle file.

     androidTestImplementation 'androidx.test:runner:1.4.0'
     androidTestImplementation 'androidx.test:rules:1.4.0'
     androidTestImplementation 'androidx.test.espresso:espresso-intents:3.4.0'
  5. Remove all test cases from ExampleInstrumentedTest in your androidTest source set. Your ExampleInstrumentedTest file should look like the empty class below.

     @RunWith(AndroidJUnit4::class)
     class ExampleInstrumentedTest {
     }
  6. Append MainActivity#onCreate() with the code below.

     findViewById<Button>(R.id.button_launchIntent).setOnClickListener {
        val intent = Intent(ACTION_VIEW).apply {
            data = intentData
        }
    
        startActivity(intent)
     }
  7. Add the companion object below into MainActivity as well.

     companion object {
        val intentData: Uri = Uri.Builder()
            .scheme("geo")
            .query("0,0")
            .appendQueryParameter("q", "First St SE, Washington, DC, 20004")
            .build()
     }
Project Overview

The tutorial …

dimitrilc 30 Junior Poster
Introduction ##

When working with Espresso tests, you might have found it hard to make Espresso wait for background tasks to complete before performing other actions or assertions. Fortunately, the classes in the Espresso idling package exist to cover this use case.

In this tutorial, we will learn how to use one of those classes called CountingIdlingResource.

Goals

At the end of the tutorial, you would have learned:

  1. How to use CountingIdlingResource in Espresso tests.
Tools Required
  1. Android Studio. The version used in this tutorial is Android Studio Chipmunk 2021.2.1 Patch 1.
Prerequisite Knowledge
  1. Intermediate Android.
  2. Basic Espresso.
  3. Basic understanding of async operations.
Project Setup

To follow along with the tutorial, perform the steps below:

  1. Create a new Android project with the default Empty Activity.

  2. Add the dependencies below into your module build.gradle file.

     implementation 'org.jetbrains.kotlinx:kotlinx-coroutines-android:1.6.1'
     implementation 'androidx.test.espresso:espresso-idling-resource:3.4.0'
     androidTestImplementation 'androidx.test:runner:1.4.0'
     androidTestImplementation 'androidx.test:rules:1.4.0'
  3. Replace activity_main.xml with the code below. We simply changed the textSize and added an android:id to TextView.

     <?xml version="1.0" encoding="utf-8"?>
     <androidx.constraintlayout.widget.ConstraintLayout xmlns:android="http://schemas.android.com/apk/res/android"
        xmlns:app="http://schemas.android.com/apk/res-auto"
        xmlns:tools="http://schemas.android.com/tools"
        android:layout_width="match_parent"
        android:layout_height="match_parent"
        tools:context=".MainActivity">
    
        <TextView
            android:id="@+id/textView_helloWorld"
            android:layout_width="wrap_content"
            android:layout_height="wrap_content"
            android:text="Hello World!"
            android:textSize="32sp"
            app:layout_constraintBottom_toBottomOf="parent"
            app:layout_constraintEnd_toEndOf="parent"
            app:layout_constraintStart_toStartOf="parent"
            app:layout_constraintTop_toTopOf="parent" />
    
     </androidx.constraintlayout.widget.ConstraintLayout>
  4. Replace the entire class ExampleInstrumentedTest with the code below. Besides the commented out lines, it is just a simple Espresso test that performs a click on the TextView, and then verifies that the new text content is correct. You do not have to understand the commented out parts for now.

     @RunWith(AndroidJUnit4::class) …
dimitrilc 30 Junior Poster
Introduction

Starting from Android 10 (API 29), Android places many restrictions on how apps can launch activities from the background.

There are a couple of exemptions, which can be found on this list. At the end of the list is the usage of the dangerous permission SYSTEM_ALERT_WINDOW. I have seen this permission recommended elsewhere, but usage of this permission is unnecessary to show an Activity for an alarm application and violates best practices for Android permission. Even the stock Clock app does not require this permission, the only install-time permission that it needs is SCHEDULE_EXACT_ALARM.

The correct way to show an Activity with an alarm is by using a notification with a full-screen Intent.

Goals

At the end of the tutorial, you would have learned:

  1. How to schedule an exact alarm.
  2. How to show an Activity on the lock screen even if the screen is off and the Activity destroyed.
Tools Required
  1. Android Studio. The version used in this tutorial is Android Studio Chipmunk 2021.2.1.
Prerequisite Knowledge
  1. Intermediate Android.
  2. Notification.
  3. BroadcastReceiver.
Project Setup

To follow along with the tutorial, perform the steps below:

  1. Create a new Android project with the default Empty Activity.

  2. Add the <string> resource below into strings.xml.

     <string name="schedule_alarm">Schedule Alarm</string>
  3. Replace the code in activity_main.xml with the code below. This replaces the default TextView with a Button.

     <?xml version="1.0" encoding="utf-8"?>
     <androidx.constraintlayout.widget.ConstraintLayout xmlns:android="http://schemas.android.com/apk/res/android"
        xmlns:app="http://schemas.android.com/apk/res-auto"
        xmlns:tools="http://schemas.android.com/tools"
        android:layout_width="match_parent"
        android:layout_height="match_parent"
        tools:context=".MainActivity">
    
        <Button
            android:id="@+id/button_scheduleAlarm"
            android:layout_width="wrap_content"
            android:layout_height="wrap_content" …
dimitrilc 30 Junior Poster
Introduction

When working with Room, you might have run into a situation where you only want to update specific fields of an entity instead of replacing the entire row. In this tutorial, we will learn how to do this in two different ways.

Goals

At the end of the tutorial, you would have learned:

  1. How to update individual fields of an entity.
Tools Required
  1. Android Studio. The version used in this tutorial is Android Studio Chipmunk 2021.2.1.
Prerequisite Knowledge
  1. Intermediate Android.
  2. Room database.
Project Setup

To follow along with the tutorial, perform the steps below:

  1. Create a new Android project with the default Empty Activity.

  2. Add the dependencies for Room in the module build.gradle file.

     def room_version = "2.4.2"
    
     implementation "androidx.room:room-runtime:$room_version"
     kapt "androidx.room:room-compiler:$room_version"
     implementation "androidx.room:room-ktx:$room_version"
     implementation 'androidx.lifecycle:lifecycle-runtime-ktx:2.4.1'
  3. In the same file, add the kapt plugin under plugins.

     id 'kotlin-kapt'
  4. Create a new data class called User.kt. This class will be used as an entity.

     @Entity
     data class User(
        @PrimaryKey val id: Int = 1,
        val name: String,
        val age: Int
     )
  5. Create a new Dao for the User entity using the code below.

     @Dao
     interface UserDao {
    
        @Insert(onConflict = OnConflictStrategy.IGNORE)
        fun insert(vararg users: User)
    
        @Update
        fun update(vararg users: User)
    
        @Delete
        fun delete(vararg users: User)
     }
  6. Create a MyDatabase class using the code below.

     @Database(entities = [User::class], version = 1)
     abstract class MyDatabase : RoomDatabase() {
        abstract fun …
dimitrilc 30 Junior Poster
Introduction

On the android platform, widgets provide a quick way to interact with your Apps. They are extremely useful at providing quick information without the user launching the app Activities themselves. Common use cases for homescreen widgets are weather, email, or banking information.

In this tutorial, we will learn how to create a widget for our Android app.

Goals

At the end of the tutorial, you would have learned:

  1. How to create a homescreen widget.
Tools Required
  1. Android Studio. The version used in this tutorial is Android Studio Chipmunk 2021.2.1.
Prerequisite Knowledge
  1. Intermediate Android.
Project Setup

To follow along with the tutorial, perform the steps below:

  1. Create a new Android project with the default Empty Activity.
Steps to create a Widget

There are three basic things that we would need to create a widget:

  1. An AppWidgetProviderInfo object. We can just declare the configuration for this object in an XML file.
  2. An XML file that contains the layout for the widget. A layout for a widget is a lot different than a layout for Activity/Fragment because you are only able to use the View and ViewGroups defined in RemoteViews[https://developer.android.com/reference/android/widget/RemoteViews].
  3. An implementation of AppWidgetProvider. An AppWidgetProvider is just a BroadcastReceiver, so you can intercept Intents in this class. We will also need to define this implementation in the manifest.

The Android Studio IDE supports creating all of these files, add string resources, Material 3 styles AND declaring the widget in the …

dimitrilc 30 Junior Poster
Introduction

In this tutorial, we will learn how to use ConcatAdapter. It is a great choice for displaying header or footer at the beginning or at the end of a RecyclerView.

Goals

At the end of the tutorial, you would have learned:

  1. How to use ConcatAdapter to combine Adapters.
Tools Required
  1. Android Studio. The version used in this tutorial is Android Studio Chipmunk 2021.2.1.
rerequisite Knowledge
  1. Basic Android.
  2. RecyclerView.
Project Setup

To follow along with the tutorial, perform the steps below:

  1. Create a new Android project with the default Empty Activity.

  2. Replace the content of activity_main.xml with the code below. This removes the default “Hello World” TextView and add a RecyclerView that is constrained to the parent.

     <?xml version="1.0" encoding="utf-8"?>
     <androidx.constraintlayout.widget.ConstraintLayout xmlns:android="http://schemas.android.com/apk/res/android"
        xmlns:app="http://schemas.android.com/apk/res-auto"
        xmlns:tools="http://schemas.android.com/tools"
        android:layout_width="match_parent"
        android:layout_height="match_parent"
        tools:context=".MainActivity">
    
        <androidx.recyclerview.widget.RecyclerView
            android:id="@+id/recycler"
            android:layout_width="match_parent"
            android:layout_height="match_parent"
            app:layoutManager="androidx.recyclerview.widget.LinearLayoutManager"
            app:layout_constraintBottom_toBottomOf="parent"
            app:layout_constraintEnd_toEndOf="parent"
            app:layout_constraintStart_toStartOf="parent"
            app:layout_constraintTop_toTopOf="parent" />
     </androidx.constraintlayout.widget.ConstraintLayout>
  3. Create a new layout resource called text_holder.xml to contain the view for the first ViewHolder.

     <?xml version="1.0" encoding="utf-8"?>
     <androidx.constraintlayout.widget.ConstraintLayout xmlns:android="http://schemas.android.com/apk/res/android"
        xmlns:app="http://schemas.android.com/apk/res-auto"
        xmlns:tools="http://schemas.android.com/tools"
        android:layout_width="match_parent"
        android:layout_height="wrap_content">
    
        <TextView
            android:id="@+id/textView_holder"
            android:layout_width="wrap_content"
            android:layout_height="wrap_content"
            app:layout_constraintBottom_toBottomOf="parent"
            app:layout_constraintEnd_toEndOf="parent"
            app:layout_constraintStart_toStartOf="parent"
            app:layout_constraintTop_toTopOf="parent"
            tools:text="Text Holder Content" />
     </androidx.constraintlayout.widget.ConstraintLayout>
  4. Add the vector image below as a drawable resource using the name ic_android_black_24dp.

     <vector android:height="24dp" android:tint="#000000"
        android:viewportHeight="24" android:viewportWidth="24"
        android:width="24dp" xmlns:android="http://schemas.android.com/apk/res/android">
        <path android:fillColor="#FF000000" android:pathData="M17.6,11.48 L19.44,8.3a0.63,0.63 0,0 0,-1.09 -0.63l-1.88,3.24a11.43,11.43 0,0 0,-8.94 0L5.65,7.67a0.63,0.63 0,0 0,-1.09 0.63L6.4,11.48A10.81,10.81 0,0 0,1 20L23,20A10.81,10.81 0,0 0,17.6 11.48ZM7,17.25A1.25,1.25 0,1 1,8.25 16,1.25 1.25,0 0,1 7,17.25ZM17,17.25A1.25,1.25 0,1 1,18.25 16,1.25 1.25,0 0,1 17,17.25Z"/>
     </vector>
  5. Create another layout resource …

dimitrilc 30 Junior Poster
Introduction

Rather than modifying the button widget’s appearance in code, it is possible to do this in an XML resource instead. In this tutorial, we will learn how to create two different types of specialized XML resource files for changing the Drawable and the color.

Goals

At the end of the tutorial, you would have learned:

  1. How to use a Color State List resource.
  2. How to use a Drawable State List resource.
Tools Required
  1. Android Studio. The version used in this tutorial is Android Studio Chipmunk 2021.2.1.
Prerequisite Knowledge
  1. Basic Android.
Project Setup

To follow along with the tutorial, perform the steps below:

  1. Create a new Android project with the default Empty Activity.

  2. Add the vector resource below as ic_baseline_arrow_24.xml into drawable.

     <vector android:height="24dp" android:tint="#000000"
        android:viewportHeight="24" android:viewportWidth="24"
        android:width="24dp" xmlns:android="http://schemas.android.com/apk/res/android">
        <path android:fillColor="@android:color/white" android:pathData="M8,5v14l11,-7z"/>
     </vector>
  3. Replace the code inside of activity_main.xml with the code below. The screen will now contain a single ImageButton for us to play with.

     <?xml version="1.0" encoding="utf-8"?>
     <androidx.constraintlayout.widget.ConstraintLayout xmlns:android="http://schemas.android.com/apk/res/android"
        xmlns:app="http://schemas.android.com/apk/res-auto"
        xmlns:tools="http://schemas.android.com/tools"
        android:layout_width="match_parent"
        android:layout_height="match_parent"
        tools:context=".MainActivity">
    
        <ImageButton
            android:id="@+id/imageButton"
            android:layout_width="200dp"
            android:layout_height="200dp"
            android:backgroundTint="#00FFFFFF"
            android:scaleType="fitCenter"
            app:layout_constraintBottom_toBottomOf="parent"
            app:layout_constraintEnd_toEndOf="parent"
            app:layout_constraintStart_toStartOf="parent"
            app:layout_constraintTop_toTopOf="parent"
            app:srcCompat="@drawable/ic_baseline_play_arrow_24" />
     </androidx.constraintlayout.widget.ConstraintLayout>
  4. If we run the app now, it should look like the screenshot below.

Screenshot_2022-05-13_211656.png

Creating a Color State List Resource

Conceptually, a state list resource is an XML file that tells Android what to do when a widget is in a certain state. For Button-type widgets, the common states are focused, …

dimitrilc 30 Junior Poster
Introduction

The Android platform provides many different types of menus to be added to an Android app. In this tutorial, we will learn how to add the most common type of menu, an Options Menu.

An Options Menu is one that appears at the right corner of the Action Bar/Toolbar. By default, all items in the menu is contained inside the overflow action.

options_menu_1.png

Goals

At the end of the tutorial, you would have learned:

  1. How to add an Options Menu to an Android app.
Tools Required
  1. Android Studio. The version used in this tutorial is Bumblebee 2021.1.1 Patch 3.
Prerequisite Knowledge
  1. Basic Android.
  2. Action Bar/Toolbar.
Project Setup

To follow along with the tutorial, perform the steps below:

  1. Create a new Android project with the default Empty Activity.

  2. Give the default TextView an android:id of hello.

  3. Change its android:textSize to 32sp.

     <?xml version="1.0" encoding="utf-8"?>
     <androidx.constraintlayout.widget.ConstraintLayout xmlns:android="http://schemas.android.com/apk/res/android"
        xmlns:app="http://schemas.android.com/apk/res-auto"
        xmlns:tools="http://schemas.android.com/tools"
        android:layout_width="match_parent"
        android:layout_height="match_parent"
        tools:context=".MainActivity">
    
        <TextView
            android:id="@+id/hello"
            android:layout_width="wrap_content"
            android:layout_height="wrap_content"
            android:text="Hello World!"
            android:textSize="32sp"
            app:layout_constraintBottom_toBottomOf="parent"
            app:layout_constraintLeft_toLeftOf="parent"
            app:layout_constraintRight_toRightOf="parent"
            app:layout_constraintTop_toTopOf="parent" />
    
     </androidx.constraintlayout.widget.ConstraintLayout>
Add an Options Menu using XML

The easiest way to add an Options Menu to an Action Bar is by declaring the menu in an XML file and then inflating it in the Activity’s onCreateOptionsMenu() function.

We will start with creating a simple menu with three items in it:

  • Refresh.
  • Help.
  • Settings.
  1. Right-click on res -> New -> Android Resource File.

  2. Name the …

dimitrilc 30 Junior Poster
Introduction

The Android platform provides many different types of menus to be added to an Android app. In this tutorial, we will learn how to add Contextual Menus to our app.

Goals

At the end of the tutorial, you would have learned:

  1. How to add a floating contextual menu.
  2. How to add a contextual menu in action mode.
Tools Required
  1. Android Studio. The version used in this tutorial is Bumblebee 2021.1.1 Patch 3.
Prerequisite Knowledge
  1. Basic Android.
  2. Menu XML resource.
Project Setup

To follow along with the tutorial, perform the steps below:

  1. Create a new Android project with the default Empty Activity.

  2. Give the default TextView an android:id of hello and android:textSize of 32sp.

  3. Your activity_main.xml should look like the code below.

     <?xml version="1.0" encoding="utf-8"?>
     <androidx.constraintlayout.widget.ConstraintLayout xmlns:android="http://schemas.android.com/apk/res/android"
        xmlns:app="http://schemas.android.com/apk/res-auto"
        xmlns:tools="http://schemas.android.com/tools"
        android:layout_width="match_parent"
        android:layout_height="match_parent"
        tools:context=".MainActivity">
    
        <TextView
            android:id="@+id/hello"
            android:layout_width="wrap_content"
            android:layout_height="wrap_content"
            android:text="@string/hello_world"
            android:textSize="32sp"
            app:layout_constraintBottom_toBottomOf="parent"
            app:layout_constraintLeft_toLeftOf="parent"
            app:layout_constraintRight_toRightOf="parent"
            app:layout_constraintTop_toTopOf="parent" />
    
     </androidx.constraintlayout.widget.ConstraintLayout>
  4. Add the string resources below into your strings.xml file.

     <string name="shuffle">Shuffle</string>
     <string name="reset">Reset</string>
     <string name="insert_random">Insert Random</string>
     <string name="hello_world">Hello World!</string>
  5. Add a menu XML resource called contextual.xml under res/menu. This will represent a menu with 3 options, Shuffle, Reset, and Insert Random. Later on, these actions will be performed on the default TextView.

     <?xml version="1.0" encoding="utf-8"?>
     <menu xmlns:android="http://schemas.android.com/apk/res/android">
    
        <item
            android:id="@+id/shuffle"
            android:title="@string/shuffle" />
        <item
            android:id="@+id/reset"
            android:title="@string/reset" />
        <item
            android:id="@+id/insert_random"
            android:title="@string/insert_random" />
     </menu>
Contextual Menu modes

A Contextual Menu can operate in two different modes:

dimitrilc 30 Junior Poster

Here are a couple of suggestions that I got.

  1. The 5600x has a base clock of 3.7 GHz, since you stated that it is running at 3.8 GHz, I assume that you are overclocking? The stock cooler that shipped with the CPU can't handle that, so maybe you can reset the clock back to factory setting.
  2. The brand of your PSU seems unusual. Ratings aren't the same as quality, and it is probably failing to deliver enough power. The PSU is probably the most important component in your PC, so get a good one from well known brands like Corsair, EVGA; but still, check the reviews of the products first.
  3. Definitely update your BIOS to the latest version.
  4. Clean out all dust and grime in your pc.
dimitrilc 30 Junior Poster
Introduction

Among all of the Android libraries, Paging 3 is perhaps one of the hardest to understand.

Personally, I think the problem with Paging 3 are:

  1. Developers need to learn a lot of custom classes before they can understand how Paging 3 works under the hood and how to use the library to its fullest potential. The list of classes is long. It includes:

     CombinedLoadStates
     ConcatAdapter
     DiffUtil
     LoadState
     LoadStateAdapter
     LoadStates
     LoadType
     Pager
     PagingConfig
     PagingData
     PagingDataAdapter
     PagingSource
     PagingSource.LoadResult
     PagingState
     RemoteMediator
     RemoteMediator.MediatorResult
  2. You will have to dig deep into Pager/PagingDataAdapter source code to understand how PagingSource and PagingData are invalidated. Because you are not in control of creating PagingData yourself, how the PagingSource/PagingData pair is created and invalidated can be too magical for comfort.

  3. Unlike other libraries that only provide functionality for a specific layer, Paging 3 library classes span across multiple layers of your App: UI, ViewModel, Repository, Database.

On the bright side… The final result is not a lot of code, and using this pre-made library would still most likely be simpler than rolling your own.

Paging 3 can operate in two different modes. The first mode only displays paged data from a network without an offline database as a cache. In the second mode, you can enlist a local Room database to use as your cache, for offline support.

In this tutorial, we will learn how to use Paging 3 without an offline database.

Goals

At the end of …

dimitrilc 30 Junior Poster
Introduction

The Android Paging 3 library can operate in two modes, with an offline Room database as a source of truth or without one. In this tutorial, we will look at how to use Paging 3 with a local Room database.

This tutorial expands on the previously published Paging 3 tutorial without an offline database here. Paging 3 is somewhat complex, so if you are new to the library, I would recommend checking out the tutorial without RemoteMediator first.

Goals

At the end of the tutorial, you would have learned:

  1. How to use RemoteMediator with Paging 3.
Tools Required
  1. Android Studio. The version used in this tutorial is Bumblebee 2021.1.1 Patch 3.
Prerequisite Knowledge
  1. Intermediate Android.
  2. MVVM.
  3. Hilt.
  4. Kotlin Flow.
  5. Retrofit.
  6. Moshi.
  7. ViewBinding.
  8. DataBinding.
  9. Room.
  10. Basic SQL.
Project Setup

To follow along with the tutorial, perform the steps below:

  1. Clone the sample app called CatFacts from https://github.com/dmitrilc/CatFacts.git
  2. Switches to the With_RemoteMediator branch.
Project Overview

The project has been completed, but we will walk through the important classes to understand how RemoteMediator is used.

In the project structure below, the classes and packages in red can be ignored, while the ones in green are important to the topic.

app_structure_with_RemoteMediator.png

The App is very simple. It only loads Cat Facts from the Cat Facts API and displays them in a RecyclerView.

There are also some TextViews at the top of the screen to show statistics about the pages. This …

dimitrilc 30 Junior Poster
Introduction

Among the many ways to create your own View, extending an existing View is the simplest option. This is because you are inheriting pre-made attributes, drawing, and accessibility features.

In this tutorial, we will learn how to create our own custom View by extending an existing View class from the Android framework.

Goals

At the end of the tutorial, you would have learned:

  1. How to extend an Android View.
Tools Required
  1. Android Studio. The version used in this tutorial is Bumblebee 2021.1.1 Patch 3.
Prerequisite Knowledge
  1. Basic Android.
Project Setup

To follow along with the tutorial, perform the steps below:

  1. Create a new Android project with the default Empty Activity.
  2. Remove the default TextView from activity_main.xml.
Extend a View in Kotlin/Java

The first thing that we need to do in order to extend a framework View is to declare it in source code.

The class that we want to extend for this tutorial is the Switch class (android.widget.Switch), so follow the steps below to extend Switch.

  1. Create a new class called MySwitch using the code below.

     class MySwitch(context: Context) : Switch(context)
  2. The compiler will complain that you should use SwitchCompat instead, which is what you should actually do in real code. It does not really matter which Switch class to use for this tutorial, so you can simply suppress the warning by adding the @SuppressLint("UseSwitchCompatOrMaterialCode") annotation to MySwitch.

     @SuppressLint("UseSwitchCompatOrMaterialCode")
     class MySwitch(context: Context) : Switch(context)