Large language models are trained on a fixed corpus, and their knowledge is often limited by the documents they are trained on. Techniques like retrieval augmented generation, continuous pre-training, and fine-tuning enhance an LLM's default knowledge. However, these techniques can still not enable an LLM to answer queries that require web searching.
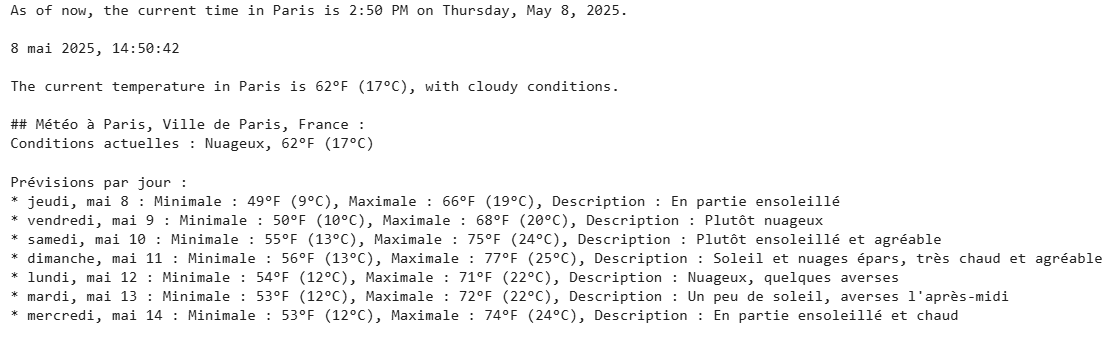
AI agents use a term tool that allows LLMs to access external knowledge sources such as databases, APIs, and the Internet. To simplify this procedure, OpenAI has introduced a Web Search API that allows you to search the Internet using natural queries through large language models.
You can integrate the Web Search API in Python using the OpenAI Python library. However, most advanced agentic applications in Python are developed using an orchestration framework such as LangGraph. Therefore, it is important to understand the process of integrating the Web Search API in LangGraph.
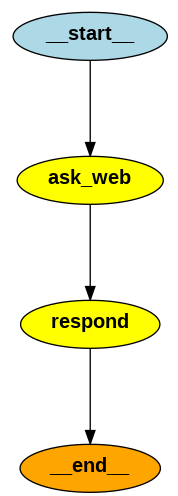
This article will show you how to integrate the OpenAI Web Search Preview API in a LangGraph node. After reading this article, you can develop LangGraph applications that involve searching the Internet using the OpenAI Web Search Preview API.
So, let's begin without ado.
The following script installs the libraries required to run the codes in this article. We will also install the graphviz and libgraphviz libraries to draw the graph diagrams.
# !sudo apt-get update
# !sudo apt-get install -y graphviz libgraphviz-dev

!pip install -U -q \
langgraph langchain-openai langchain-core \
openai pydantic graphviz pygraphviz
The script below …